by Jen_F | Blog, Fabric, Jen_F, Our Art, Shari_T, Upcycled Projects
If you’ve read many of our posts, you probably know by now that even though we take our arts seriously, sometimes we just go wonky funny.
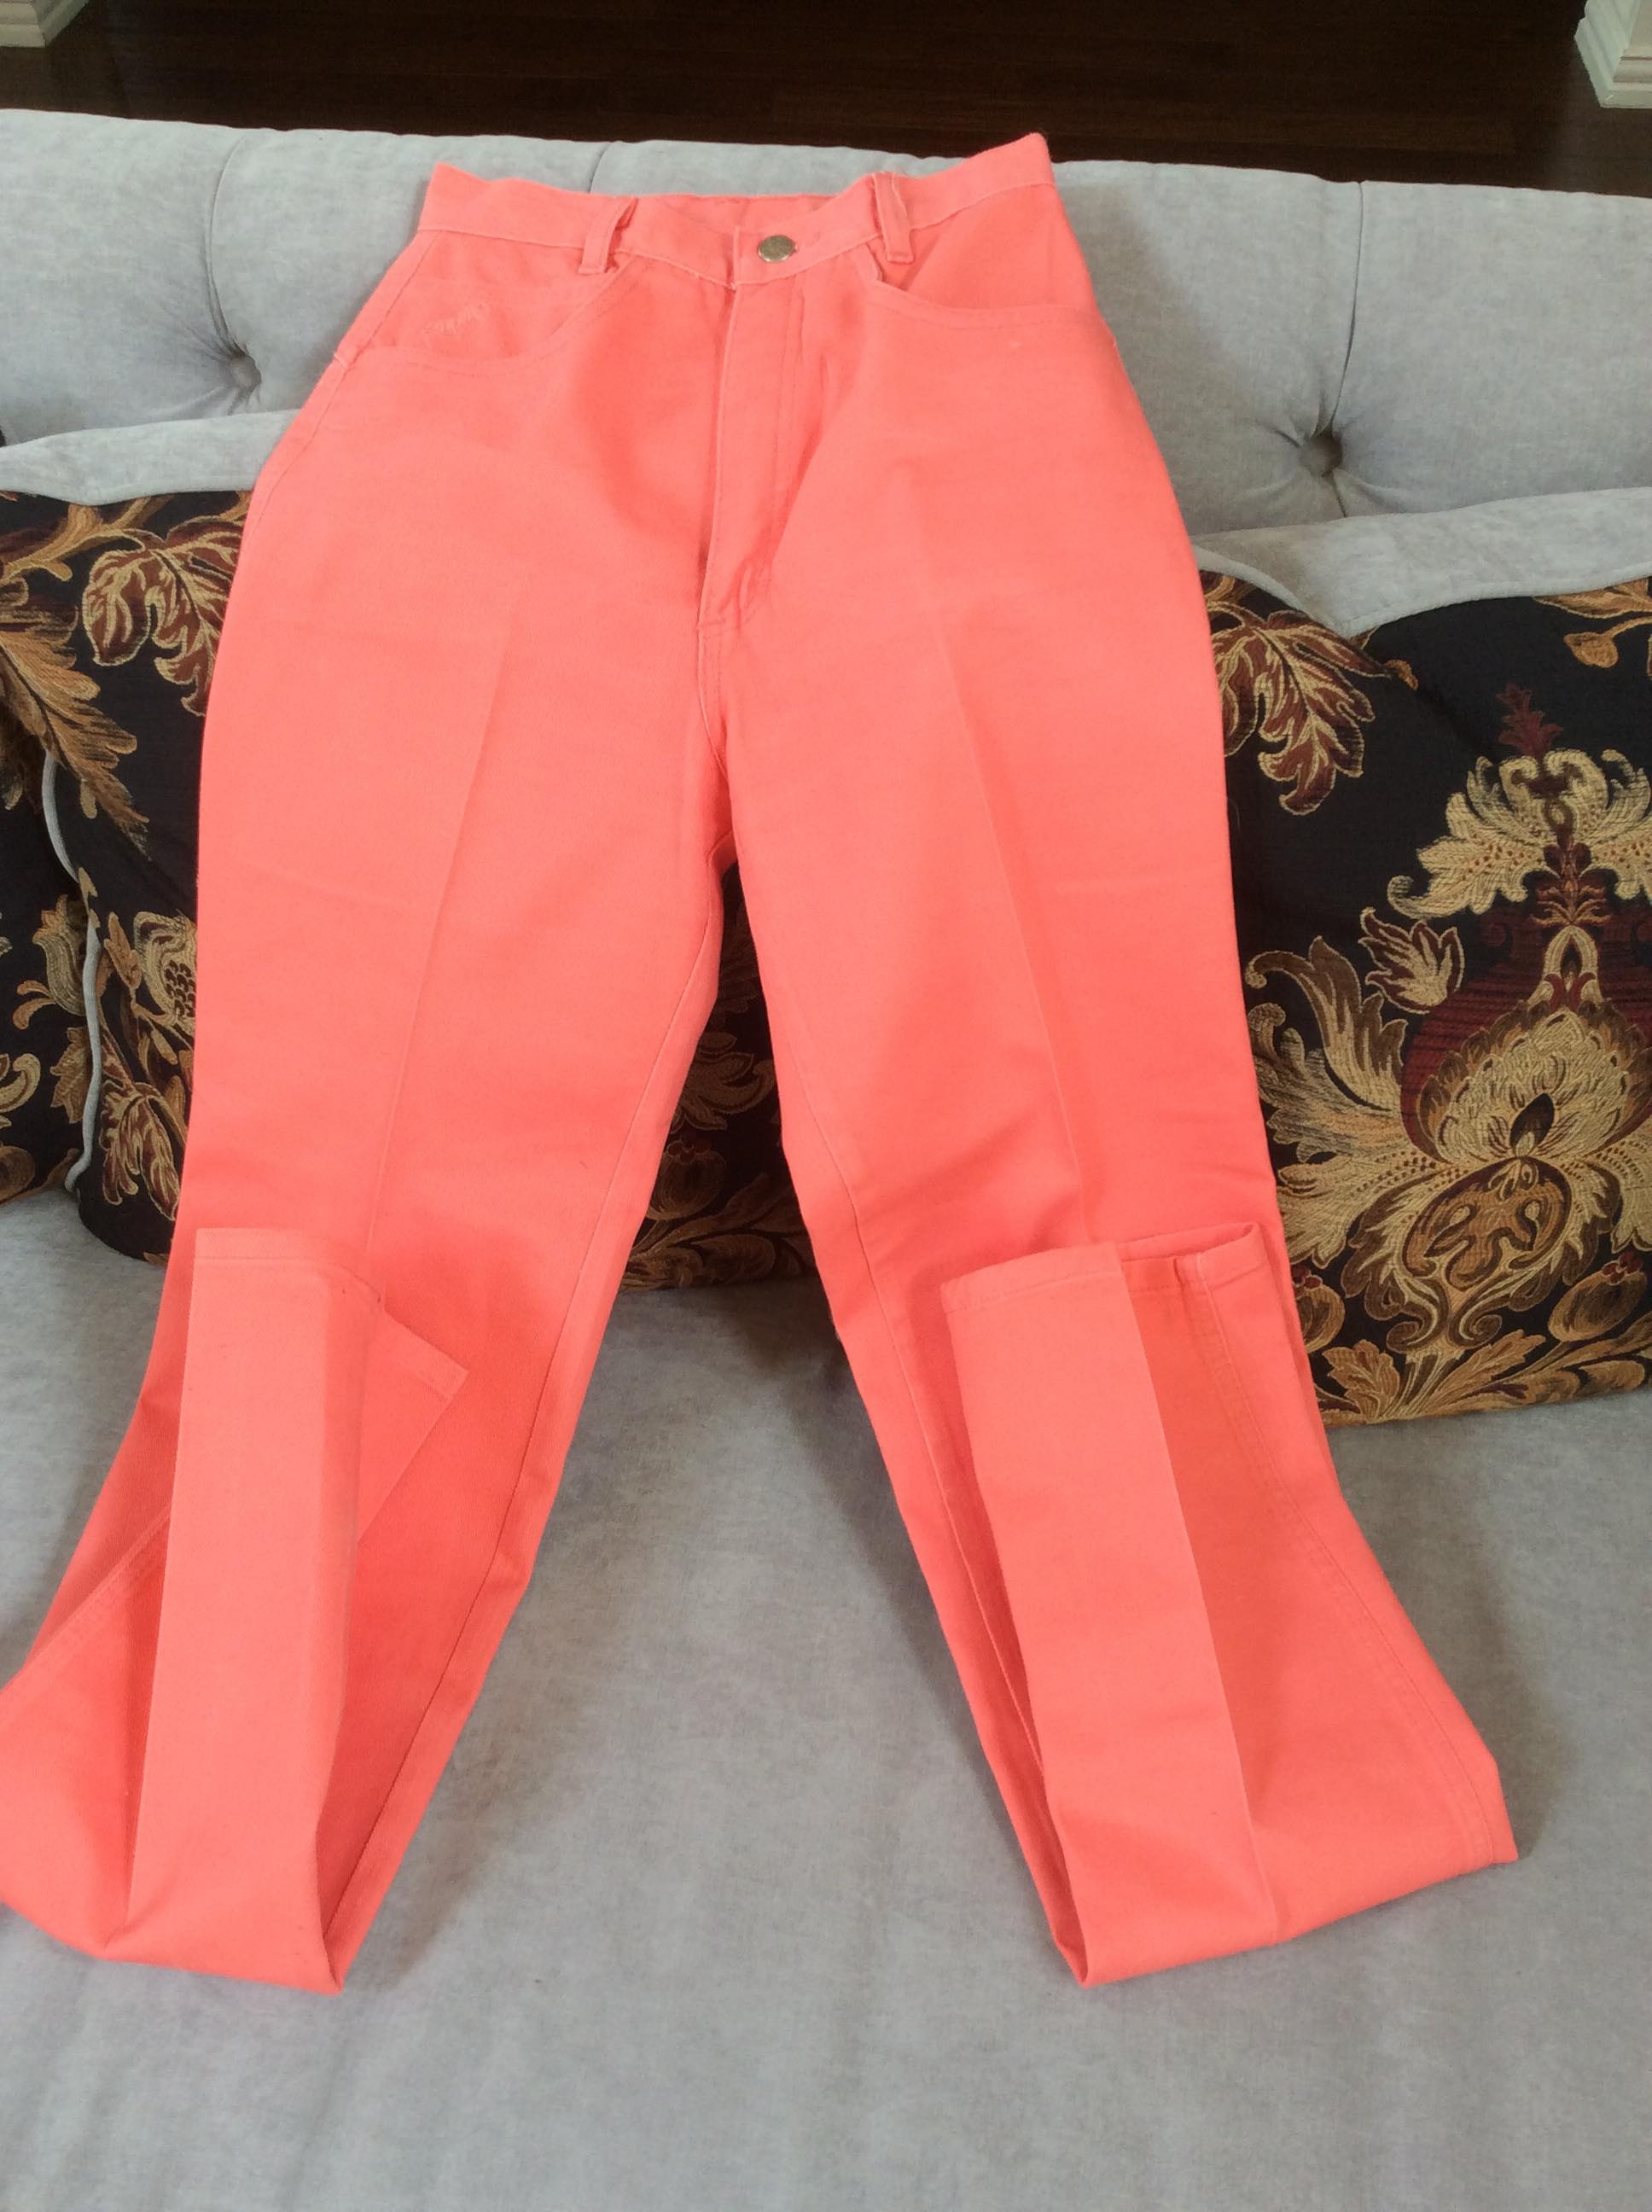
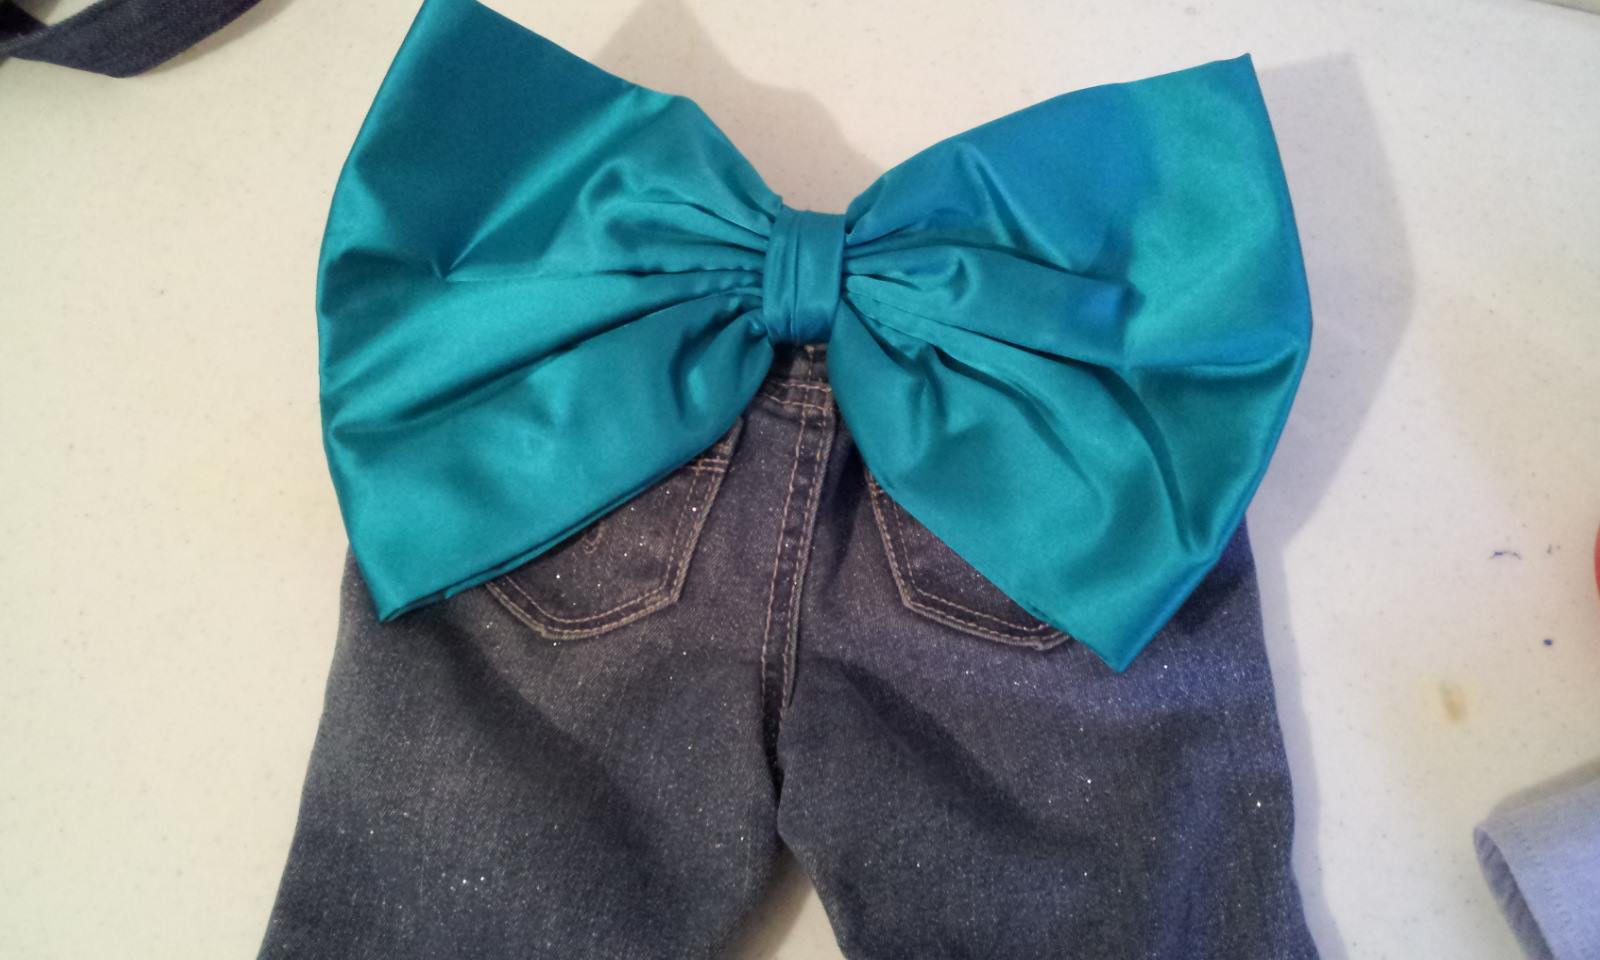
So here’s the back story… Shari bought this pair of interestingly colored pants….
And, of course, she shared it with us in the Sisters/Mother FB chat group.
Since no one was asking ME to wear them, I just moved on as I suspect, everyone else did. …. Except Shari …. because she had plans for those pants and she wasn’t telling anyone either…
The next day, she and I are private chatting about this and that, when she decides to “SHOW” me the part that she had hinted the day before might be “really SPECIAL” about those salmon pants.
So, here’s the convo:
Shari: I was just going to send you this…cuz I know you’ve been waiting…
Jen: with baited breath –
Shari:
.
Jen: how precious (Frankly, what else can you say to something like THAT ????? OMG??? What on earth is THAT? – lol)
.
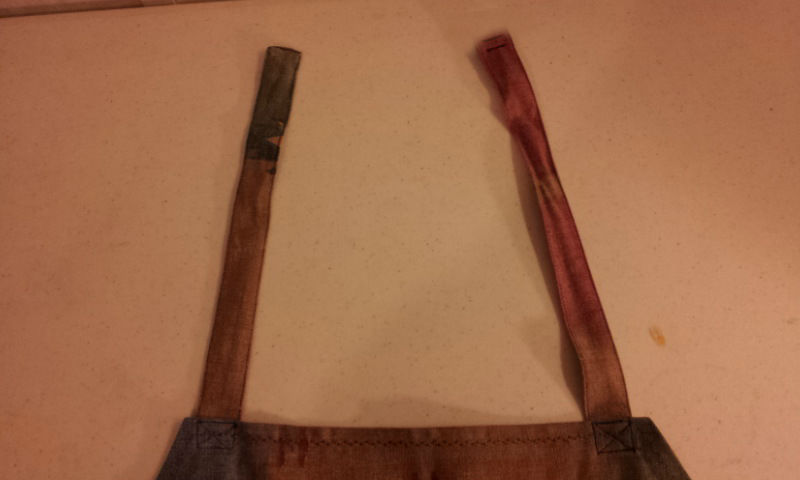
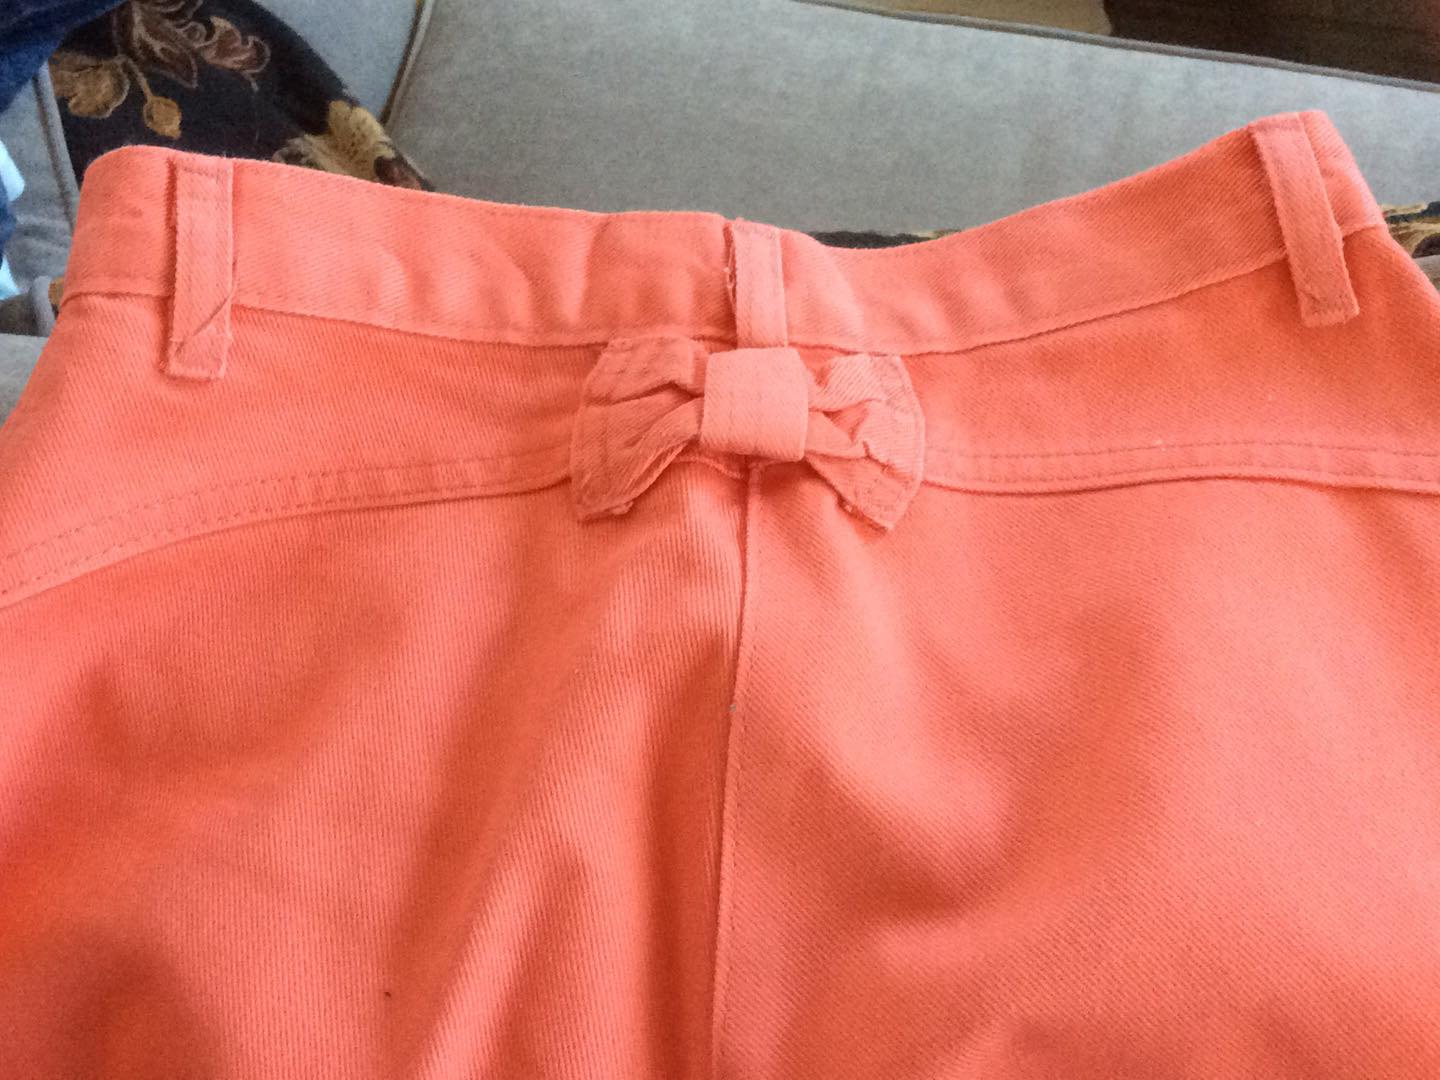
Shari: The bow on the salmon jeans butt. LOL
Sorry, but they are a size 3. LOL
Jen: I’m a bit jealous.. good thing I can sew- I just happen to have a bow– just have to pick out the pants — hang on, I’ll get the bow
Shari: Which means by today standards, it about a -0.
Jen: Please don’t hurt my feelings by saying it’s too much — I just soooo want to wear this when I go out shopping — maybe even the dentist office?
Shari: Ok
Jen:
Jen: now who’s jealous ? – lol lol
Shari: You go right ahead and wear it. Let me know what people say, because that’s a show stopper, alrighty.
Wow.
Jen: do you really mean it? You’re not just trying to save my feelings?
It is WOWSER though – not just WOW
Shari: Oh no, it’s definitely a wowser!
Jen: people be looking and pointing at me as I go through the store—
‘WOWSER, look at that bow’ !!!
Shari: You let me know how many orders you get.
Jen: Yeah, that’s about how I see it going. LOL ……………could see me/ my butt and bow – on the cover of some fashion mag — you never know, so sorry about your tiny bow— but the color is nice
Shari: LOL – liar.
It’s ugly – bow and color. LOL
Jen: well, I MIGHT be talked into making you a bigger bow, but I’d need to cut off one of the legs of those salmon pants to do it — hey, but you’d be hot walking through Target
Shari: If I were a size -0, I’d be right on that offer. LOL
Jen: somehow I’m getting the feeling you’re a bit relieved about that size thing right about now …
Shari: Never felt better about being a 10-12 in my life. LOL
……………
So, tell me, dear reader … Wouldn’t you really rather have MY bow on the backside of your pants than Shari’s little bitty, dinky bow?
Tell us how you feel –
So, in the mean time….
Live Every Moment, Love Beyond Words, Laugh Everyday,
~Jennifer
4TxSisters at Etsy
by Jen_F | 4TxSisters Etsy, Aprons, Blog, Fabric, Jen_F, Our Art, Transformations, Upcycled Projects
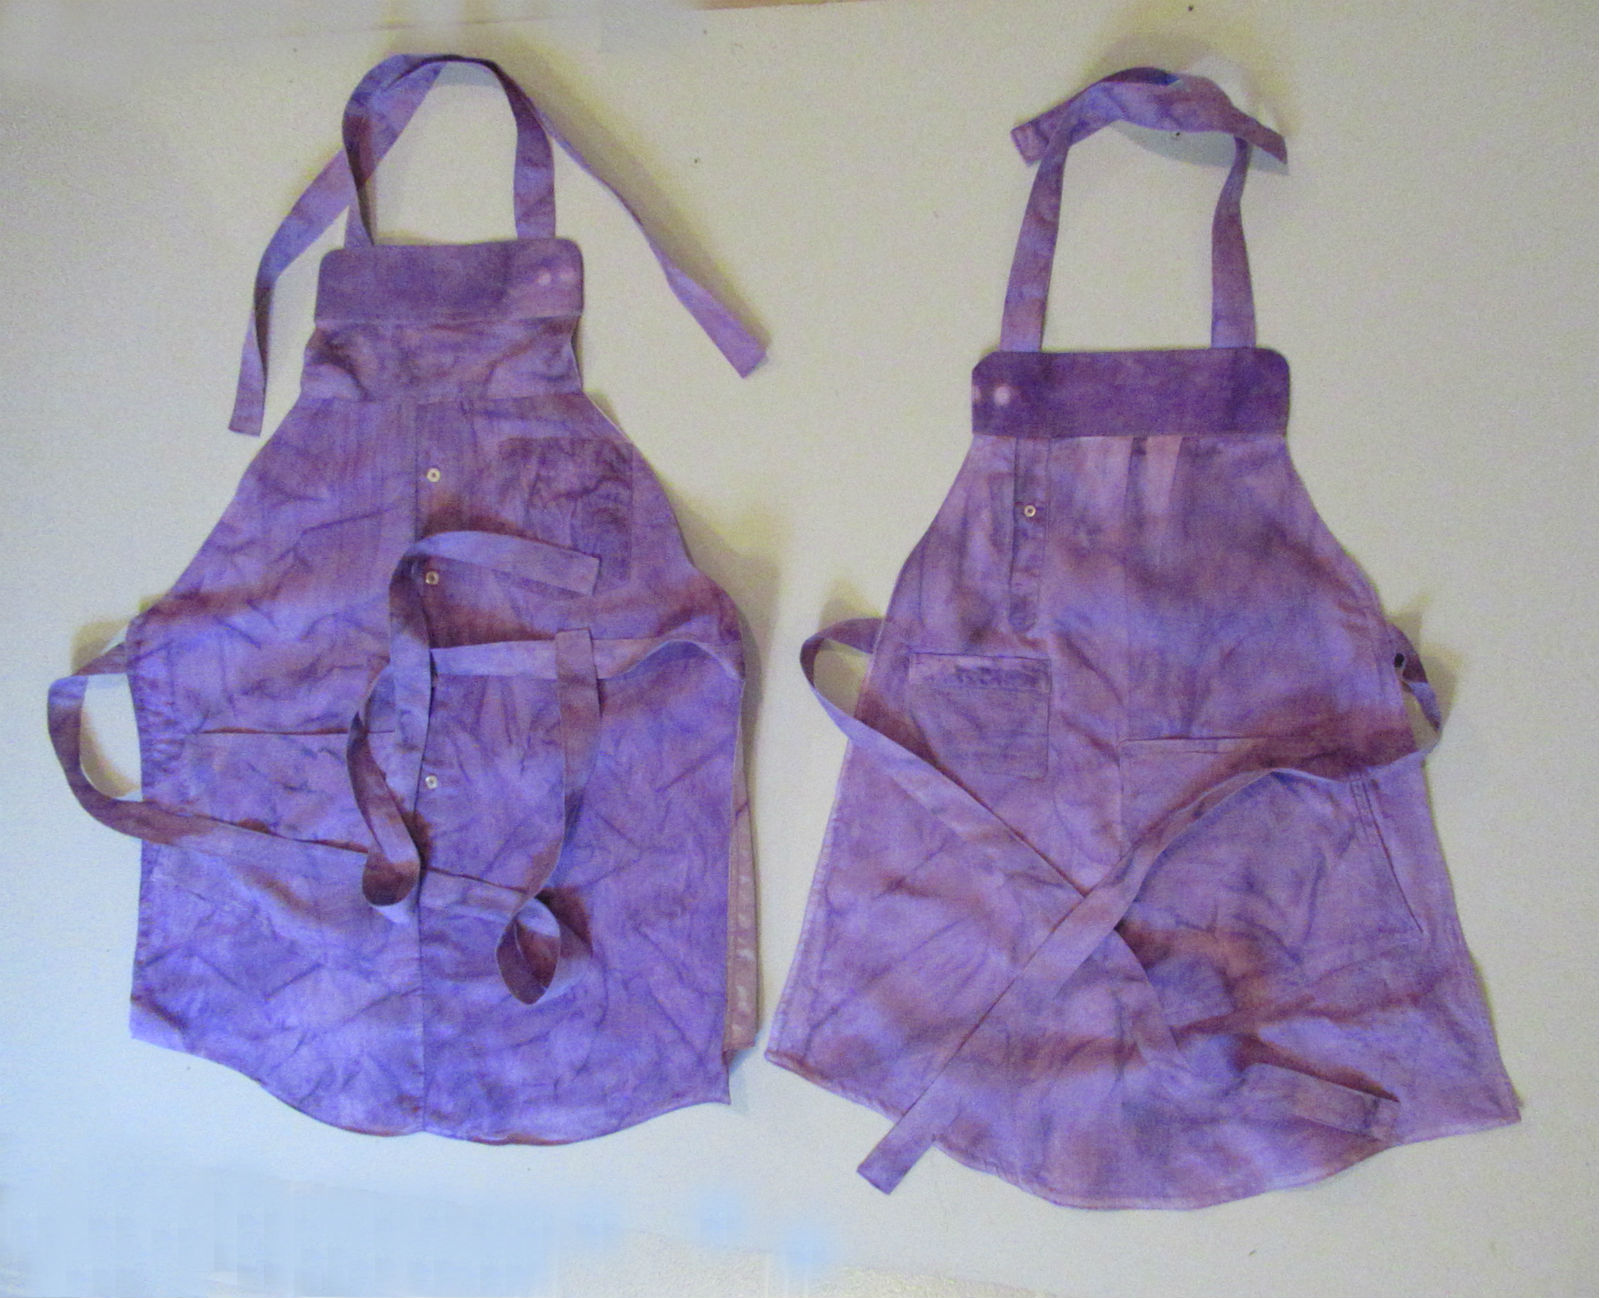
Using an man’s shirt, no pattern, just an image in your head of what you want instead of a piece of fabric, putting a pattern to it, cutting it out, sewing it up and saying “here’s an apron” … well, it has its own sort of excitement for a fly-by-the-seat-of-your-pants seamstress.


But besides the uniqueness of using a man’s shirt, why would I make an apron, and then make an apron for you too? Here’s why. In my opinion there are three typical issues with aprons
#1 They bunch up my clothes
#2 They come untied
#3 The top rides low and stuff still gets on my clothes because, frankly, there’s a shorter distance between my mouth and my chest than my mouth and the top of most aprons.
So, to eliminate issue #1, the cloth of the apron bunching up as I putter around the house, I line my aprons. And I think you’ll find that once you use a lined apron, you’ll be hard pressed to wear a plain ole’ apron again.

#2 – They come untied. I made aprons for my 3 sisters and my mother re-purposing some beautiful western fabric Shari had had me make curtains out of years ago. Next older sister, Deb, complained that she never wore hers or many other aprons because they come untied.
She likes an apron with really long ties that she can wrap around and tie in front… So…. that’s why most of my aprons have really LONG waist ties.

#3 – Aren’t all aprons made too long in the neck for most people? I always assumed everyone bought aprons and just tied, safety pinned, or clothes pinned the neck tie. With that in mind, I have to tell you I was broken hearted when my mother wanted me to have an apron I made for her back because she thought it was too pretty for her to wear.
She hadn’t safety pinned, clothes pinned or tied the neck part shorter. She’d taken a pair of scissors and whacked, yes, I said “WHACKED” that neck tie almost at the half way point and tied it to the length she wanted.
Well, once I got off the floor from shock, I realized that was an issue all of its own. Then I went to visit sister, Shari. She wears her apron almost right under her neck. She said it’s either that or a bib- lol – so then I knew… there’s a BIG issue with apron neck heights… well, at least in my family, so it was time to ‘fix that’.
And this is only a couple of ways to fix that…


And now you can, adjust away 
Recently I have even gone back to the basics of aprons by making them with ties- which makes it TOTALLY adjustable–of course, up to the length of the ties. lol
So, there, now you know why I’ve done some unusual things with my aprons by lining them, making the neck adjustable in most cases with buttons,(now with ties) and then made really LONG waist ties on many of them.. I hope you will give one a try. I don’t think you will want to buy another apron off the shelf again much less give something like that to a loved one.
You can find more of my Man’s Shirt Aprons over in our 4TxSisters Etsy Shop.
So, in the mean time….
Live Every Moment, Love Beyond Words, Laugh Everyday,
~Jennifer
4TxSisters at Etsy
by Jen_F | Blog, Fabric, Jen_F, Our Art
I know, I know, based on that title you expect to to tell you how clutches came to popularity… BUT that’s not why I’m here today.
What good is a purse if you only use if for “special occasions” because it really isn’t functional?
As the designer of these clutches, I started out with a vision of a bag that would be not only sleek in design but would be functional as well. But how was I going to complete this task?
Having a bevy of patterns at my fingertips and an idea formulating in my head, I sat thumbing through them until I came upon a pattern which looked to be close to what I was wanting. Upon further study of the pattern, I discovered it was just another run of the mill pattern and nothing special at all, or at least not in my opinion. But if you do not know me, you wouldn’t know that I tend to “live a bit on the wild side from time to time”.
Quite some time later and many drafts later, I finally had a plan in my head reflecting what I think is important in a clutch and it was to the fabric center for me.
The real adventure begins with the selection of fabric for the project at hand. You can’t imagine the number of fabric pieces that can end up piled up in front of me before it finally jumps out at me and says……. “Here I am; one beautiful bag in the making!” In the meantime, while waiting for that fabric to jump out and say “me, me, me .. pick me. I’m the one” … I ended up with a real mess to pick up…. AND ended up this trip with 3, count ‘em … 1-2-3 selections that screamed “It’s gotta be me”.
So, what do you do when THREE pieces scream at you that they are “IT”? Well, if you’re me, you just say “OK then, let’s go.”
So now the work begins….. color selection for each phase of the bag, base and linings, and the appropriate number of pockets, inside and out, pouches and loops – pocket for the cell phone, etc., closures, whether they will be zippers, Velcro, snaps, magnets, all these things have to be decided.
Finally, I was ready to actually begin………… after hours of cutting, stitching, ripping seams (sometimes, because I’ve discovered I’m more fussy about certain things than I ever realized in my younger years of sewing) and accessorizing, the first of my clutches was complete and ready reveal to my sisters.
Pleased with what had developed, it was time to reveal the first in my line of clutches. I received the anticipated responses of “good job”, “looks nice”, etc, but at the end of the “show” sister, Pat, asked: “What do you plan to do with the extra strap you are offering? Do you think you could work in a pocket to store the strap inside the bag?”
First response: WHAT? The bag is finished, Pat!!!!
My second response was “LOL, Pat, I would just throw it in a drawer and forget it” , but then I realized, I had NOT created the perfect clutch .. and evidently it was not finished YET …. (smh)
But that’s what we do, we work together to improve and make an exceptional product to you. Me? What did I do? Back to the “Sewing Room” to design a storage method for the additional strap…. because frankly, not every clutch carrier just tosses their additional strap in a drawer and then forgets about it.
We are hopeful that you will appreciate the small, but meaningful improvements we have made upon a standard clutch and will want to add one to your collection of bags. I, for one, don’t think anyone should be without one really nice clutch.
You can find these two clutches at our Etsy shop, along with more.. and more to come in the future.

.

.


Check out our Etsy site to see the clutches on hand, and know that more are to come!
in the mean time….
Live Every Moment, Love Beyond Words, Laugh Everyday,
~Jen
PS: as an added bonus for sticking around to get to the end of this post, here are a couple of other bags I created that you won’t find on Etsy … YET !!! lol

.
")
.
.
And my camo bag that a few of my other sisters thought I was nuts to be making.

by Deb D | Deb_D, Fabric, Our Art, Quilting
Last year, I created a Crown Royal patchwork quilt. This year I decided to use the fronts and backs to make this one.
There are 9 rows of 7 bags. The quilting will be along the edges of the bags. I edged the sides (all 4 sides) with a dark purple flowered print, then added the batting and a yellow gold satin for the backing. I will use the edges of the backing for the binding. I will add a picture of the finished quilt at a later date.
by Deb D | Deb_D, Fabric, Our Art, Quilting
One of my friends from the Richard A. Anderson VFW Post #8953 told me they had quite a few Crown Royal bags. For those of you who might not know what that is – I didn’t either because I don’t drink Crown Royal. It is a bag made of a very lightweight flannel in a size to fit the bottle. They come in small sizes & large sizes. After working with them for awhile, I found out that within each size, they are not even the same size all the time.
So, I took on the project of making a Crown Royal quilt. Let’s step back here a minute – why is it that when you sew, everybody thinks you can do everything? I have NEVER in my life made a quilt. This was to be my first quilt & I was scared to death.
I spent months & months researching patterns for the quilt, bought books, searched on the internet, & thought about it a lot. Since this was probably going to be my one & only quilt, I turned to an Excel spreadsheet to lay out the pattern instead of buying a quilting program for my computer. For those who don’t know me, I am slightly Obsessive Compulsive Anal Retentive, to some maybe a bit more than slightly. I laid out 3 different patterns that I liked & this is my final decision:
This is a King/Queen size quilt and there are 625 individual squares that make up this quilt. I sewed 5 squares together in a line & then sewed 4 more rows of 5 squares. I combined these 5 rows into one big square. I repeated this 24 more times (giving me twenty-five 5″ square squares).
I started with a specialty square in the middle of the quilt & built my strips, alternating colors as I went. I used the flannel bags, front & back, & light fleece – white, purple tie-dye, darker purple & a light lilac, for the front. Finding the right colors was another time consuming thing.
Now remember, I am using a home sewing machine, with this HUGE quilt once it is all put together. By rolling the quilt up so I only had a little bit at a time under the needle, I finally got all of the squares within squares put together. Now comes the fun part – putting the batting & backing on the front. I laid the quilt front side down & laid the batting on the back then, after piecing the backing together (wasn’t large enough), I pinned the 3 layers together to do the quilting. What to do! what to do!
More tight rolling to get it in the needle area & turning it around to do only 1/4 at a time. I decided to do the quilting in the corners only instead of across the whole quilt & started in the middle & worked my way to the outside of the quilt.
I decided to use the sides of the bags as my binding so I had to cut them & sew them into a long strip – long enough to go around the outside of the quilt. I pinned it on the back side & folded it over & sewed it. I had a few problems with the corners but persevered & completed the quilt. It only took me 2 years or so to complete it because as I ran into a problem, I would put it aside so I could do some more research. I don’t like to keep working on a problem after I become frustrated with it – I just get in more trouble.
Here is a picture of the quilt before I put the batting, backing or binding on it.
by Deb D | Deb_D, Fabric, Our Art, Quilting
I had purchased several t-shirts for a benefit run by our local VFW over the years. I decided to make a quilt for the benefit using the previous year’s t-shirts as the basis. Each t-shirt had two design faces so that enabled me to have 8 panels. I found additional t-shirts of a patriotic theme so that I would have an even number (12). This quilt was a personal size quilt (or maybe it would fit a twin size bed).
I cut out the panels in 12″x12″ squares. In order to strengthen the fabric, I used some iron-on stabilizer. I laid the pattern out in 3 panels across and 4 panels down. For one of the extra panels, I had to manufacture. I was trying to keep my additional colors to either a black or blue background. The only other suitable panel I found was on a white t-shirt. So, I cut out & glued the white part I cut out onto one of the black t-shirt backs & stitched some rick-rack around the edge to cover the white border. I thought it came out pretty good.
I used the edges of the backing as the binding. I quilted it & then cut & folded the sides to make the binding.


")


