by Shari | Desserts, Recipes, Shari_T
The Great Cake Bake – Day 1: Red Velvet
In every cook’s/baker’s life, a little disaster must fall from time to time. Mine was right in the beginning, when I found the small bowl for my ancient Oster mixer (which I love and still use regularly) had been broken. Thankfully, I rarely use it, so moving on.

When it came time to decide what type of cake we’d have for the wedding, Red Velvet Cake was an obvious choice since the primary color for the wedding is red.
Besides, is there anything more luscious than a moist, tender cake with a hint of chocolate?
Yes, there is, actually! A RED luscious, moist, tender cake with a hint of chocolate.

Please pardon my drool.
I had never made a red velvet cake from scratch before, and if I’m being totally honest, I’ve made very few from scratch. Before we began eating healthier, I’d just use a box mix and doctor it up. Everyone always raved about my chocolate cake, and I just failed to mention it wasn’t some secret recipe; just a box, with a few secret ingredients.
I would need something special, interesting, and unique, so I scoured the Internet and old cookbooks. I lucked out and found one at www.divascancook.com, where you will be able to see the original recipe. It sounded amazing, even with a cup of coffee, and amazing is what I’m looking for in a wedding cake.
The first time I made it, I found it too oily. In all fairness, I am not sure if it was the recipe or if I simply zoned out and measured it wrong. I removed 2 tablespoons from the original recipe and tried again. Voila! What came out was a perfectly delectable, moist, tender cake. However, I don’t think it was the recipe; it was likely me being too loosey-goosey with the measurements.
In the first round, I also found that despite the oily feel, the cake stuck to the pan. I used parchment paper in the bottom of the cake pans the second time, which resolved the problem.

Overall, this cake is incredible on all counts: texture, eye appeal, moisture, tenderness and, most importantly, taste. Your mouth waters as the whole house begins to fill with the smell of this cake. It even brought the guys out of their rooms to see what was baking.
Right out of the gate, we have a winner! The other recipes had better be pretty amazing to even come close to measuring up to this one.
Red Velvet Wedding Cake
from www.divascancook.com
 Ingredients:
-
2 cups water
-
1 teaspoon baking soda
-
1 teaspoon baking powder
-
1 teaspoon salt
-
2 tablespoons unsweetened cocoa powder, sifted (*see note below)
-
2 cups sugar
-
1 cup vegetable oil (I used 1-3/4 cup, plus 2 tablespoons)
-
2 eggs
-
1 cup buttermilk (**see note below)
-
2 teaspoons vanilla extract
-
1 teaspoon white distilled vinegar
-
1/2 cup of prepared plain hot coffee (NOT optional!)
*I used regular cocoa powder in the initial baking. When I added it to the mix, it clumped. When I did the second baking, I sifted the cocoa before adding it to the mixture, which resolved the problem. I also used a dark cocoa in the second baking, and the cake was still wonderful, although I thought it somewhat lost its reddish color and looked more like chocolate cake with a hint of red.
**When I decided to bake all these cakes, I ran out and bought a gallon of whole milk (organic, of course) and gobs of eggs. Then, I read the directions. So me. Every single one of these layer cakes calls for buttermilk! So, I put 1 Tbls. of lemon juice into the 1-cup measuring device. The whole milk was added to create 1 cup. Once you’ve added the lemon juice, let it stand 10 minutes; the milk will begin to curdle and you’ll have buttermilk. I recommend using buttermilk for the richness and flavor you don’t get with a substitute, but this will work in a pinch (or in the case of over abundance of milk).
Directions:
1. Preheat over to 325 degrees.
2. Grease and flour cake pans. I used 2 8-inch pans. Line with a greased sheet of parchment paper.
3. In a medium bowl, whisk together flour, baking soda, baking powder, cocoa powder and salt. Set aside. 
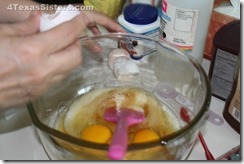
4. In a large bowl, combine sugar and oil.  5. Add the eggs, buttermilk, vanilla and red food coloring to the sugar/oil mixture and stir to combine.

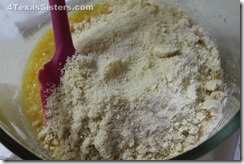
6. Add the wet ingredients to the dry ingredients a little at a time, stirring just until mixed between additions. 
7. Stir in the coffee and white vinegar.  8. Pour the batter evenly into the cake pans.
9. Bake 30-40 minutes, until a toothpick comes out clean. Do not over bake! The cake will continue to cook as it cools.
10. Run a knife around the edges of the pan to help loosen the sides; invert pan onto a cooling rack.
11. Let cakes cool.

Or, you can do what the boys and I do, and just eat it warm, without any icing.? It is that good.
What happens to the cake next? You’ll have to wait to see!
Love,
Shari
by Jen_F | Jen_F, Recipes, Salad
If you’ve been following along at all you already know that Shari fixes the meal Monday night, Deb fixes something Tuesday and Wednesday night and I do not get to cook !!! unless, of course it’s my one skillet breakfast – which up until this last trip, no one would eat it but me. Not that they didn’t like all the ingredients, they just couldn’t wrap their heads around mixing them all in the same dish ( I guess). I’ve always known that Shari’s boys were not big vegetable eaters. What I officially found out this trip was that, at least during the summer, Shari fixes a fresh fruit salad to fill in the gap for veggies for the boys.
The first night’s salad had no strawberries, which I thought to be interesting, especially since I’ve discovered I can have strawberries in moderation. In all fairness, in the past, everyone has graciously not made a BIG TO DO about Strawberries because I was allergic and now it’s just habit not to think about them when I’m going to be around. However, Shari went out Tuesday, after the emergency trip to the vet with Lefty, and picked up some fresh strawberries just for ME. If you’re old enough, you’ve heard this great snippet from an old advertisement:
“It’s shake and bake and I helped.”
Well, this is fruit salad at Shari’s and I helped. I got to slice the Strawberries. LOL 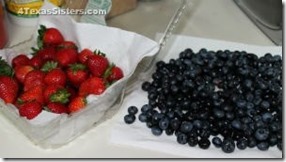 Shari had fresh peaches, fresh pineapple, fresh blue and blackberries and the strawberries. And here’s the finished project: Deb’s Marinated Pork Loin on the grill, fresh sauted spinach, cauliflower-cheese patties, the Samoa donuts, and of course, the fresh fruit salad that I got to help fix.
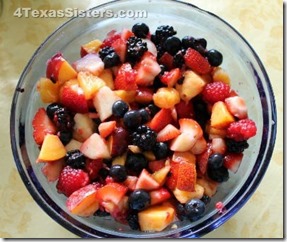
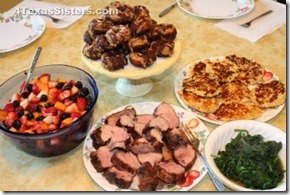
It was all, yum, yum.. Wish you had been there. Til the next time!
You?re never too young or too old…So!!!
Live Every Moment, Love Beyond Words, Laugh Everyday,
~Jennifer
by Shari | Recipes, Shari_T
Before Winter weather actually left us, we were having 3 different kinds of Oatmeal split 3 ways for our daily breakfast together. Jen was also in the midst of trying out the new camera/video recorder I gave her.
In this video, we were making Pumpkin, Banana Bread and Salty Brownie
The pumpkin version did not turn out like we had anticipated but here are the ingredients for the Banana Bread and the Salty Brownie
Ingredients:
1/2 cup rolled oats
1/2 mashed ripe banana
1/4 teaspoon baking powder
1/3 cup Almond Milk (you could use coconut milk instead)
1/4 teaspoon Vanilla
1/8 teaspoon of Molasses
For the Salty Brownie, add:
4 teaspoons of Cocoa
Large pinch of Himalayan sea salt
Prepare as follows:
Preheat the oven to 350 F and spray a single-serving oven approved dish (ramekin type) with non-stick spray.
Mix all the wet ingredients then add in the dry ingredients.
For the Saltie Brownie, sprinkle on the salt.
Bake for 18-25 minutes. Longer time will give you a more traditional brownie texture, but 18 minutes will give you a fudgy, doughy brownie
Thanks go out to The Oatmeal Artist (http://www.theoatmealartist.com) for all the inspiration.
by Deb D | Deb_D, Recipes
In a previous post, I said I would include the marinade I used for a pork tenderloin dish. This recipe is from Three Diets. One Dinner website – http://www.threedietsonedinner.com/2013/01/paleo-texas-pork-tenderloin.html
I used regular pork tenderloins and substituted chopped green chilies (Anaheims) for the jalapeno. This could also be cooked on a grill.
Pork Tenderloin : Texas Style
serves 4
2 pastured pork tenderloins
1 Tbsp dijon mustard
1 Tbsp lime juice
1 garlic clove, smashed and roughly chopped
1 jalapeno, seeded and chopped
1/3 cup soy sauce (or gluten free tamari)*
2 Tbsp Olive Oil
2 Tbsp Worcestershire Sauce
2 Tbsp apple cider vinegar
1 handful fresh cilantro, chopped
1 handful fresh basil, chopped
1 tsp pepper
*fermented soy, like soy sauce, is often considered “paleo” as the fermentation process destroys the damaging toxins in soy. However, if you are super sensitive to gluten, you may want to pick up Gluten-Free Tamari.
Combine all the ingredients in a resealable plastic bag. Add the meat, squeeze out the air and put in the fridge for at least 4 hours, preferably over night. Preheat the oven to 475º and line a sheet pan with foil. Remove the tenderloin from the bag, lay on the pan, discarding the marinade. Roast in the oven for 5 minutes. Turn down the heat to 425º and roast for 20-25 more minutes, until an instant read thermometer registers 150º. Remove from the oven and loosely wrap the foil around the pork. Let the pork rest 10 minutes before slicing and serving.

by Deb D | Deb_D, Recipes
Having been involved with the Girl Scouts organization for many years, it has been hard for son, Michael’s family to eat the cookies sold by the Girl Scouts. They went paleo/primal/primative almost a year ago so that means no flour or processed foods. I went on a quest to research recipes that I could feed the girls when they came to visit this summer.
One of the recipes I found was for Samoa Donuts. If you have ever had Samoa cookies from the Girl Scouts, you know how very, truly delicious they are – all that chocolate on the bottom of the cookie, how creamy the caramel on top is & topped off with more chocolate!!!
I try not to make many sweets unless there are other people around to help eat them. Remember, I have a truly horrible “sweet tooth.” Before the girls arrived, I made a batch of these wonderful little gems. They are good frozen, still cold, or just room temperature.
Ingredients
For the Donuts
- 2½ cups blanched almond flour
- 1/2 teaspoon baking soda
- A scant less than 1/2 teaspoon salt
- 6 tablespoons honey
- 1/4 cup coconut oil, softened or liquid
- 1 tablespoon vanilla
- 1 teaspoon Lemon juice
- 3 whole large room temp eggs
Coconut caramel topping
- 1 can full-fat coconut milk (about 1? cups)
- 1/2 cup mild flavored honey or maple syrup, (I like the syrup)
- A pinch of sea salt
- 1 rounded tablespoon ghee or butter (can sub palm shortening or coconut oil)
- 2 teaspoons vanilla extract
- 1/4 cup finely shredded coconut, plus 2 more tablespoons for garnishing
For the Dipping Chocolate
- 1 bag Enjoy Life Chocolate chips (melted in a double boiler)
Instructions
- Preheat your mini donut making machine OR preheat the oven to 350 degrees if you are using a regular donut pan or making into muffins.
- In a large bowl, mix together the almond flour, baking soda and salt.
- In another bowl, combine the honey, oil, vanilla, lemon juice and eggs.
- Add the oil/honey mixture to the dry ingredients. Mix till just combined.
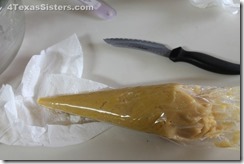
- Add about 2 tablespoons of batter to each mold in the donut machine or scoop the batter into a Ziplock bag, twisting the other end to close it. Snip the end off of one of the corners with a scissors. Start with a small cut. You can always make it bigger if you need too. Squeeze batter into molds.
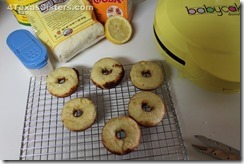
- Close the lid and allow to cook for about 2 minutes. Times will vary with each machine. Open the machine and flip over each donut using the forked ‘skewer’ that comes with most machines. Close the lid again cook for about one more minute. Remove donuts and let cool on a wire rack. Repeat with the rest of the batter.
- If using a regular donut pan, fill each well-greased mold about ¾ full. Smooth the tops if needed and bake for 10-12 minutes. Let cool in the pan for 5 minutes, remove from the pan and cool completely on a wire rack.
- Makes 12-15 mini donuts or 6 regular sized ones (depending on how much batter you eat during the prep time.)
For the Coconut Caramel
- In a small-medium heavy bottomed sauce pan, bring the coconut milk, honey and salt to a boil over medium high heat, being sure that they are well combined. Reduce to a medium heat, and let the mixture boil down for about 35-40 minutes.
- Add the ghee and vanilla, stirring it in till well incorporated. Continue cooking for another 5-15 minutes or as long as needed until it is a deep caramel color. Don?t rush the process. Depending on how hot your burner is this process could be faster or slower. Stir often toward the end to keep the bottom from burning too much. A little burning is fine as long as you are stirring it in to the mixture. It will give it a darker flavor.
- Remove from heat, transfer to a bowl and let cool for 5 minutes then stir vigorously until it?s creamy, shinny and smooth.
- While the caramel is cooking, spread the coconut out on an ungreased cookie sheet and toast the coconut in a 325 degree oven. Stir often till golden, about 5-10 minutes. Remove from the oven and let cool.
- Mix the toasted coconut into the caramel minus a tablespoon or so for garnishing later. Use coconut caramel while still warm for best spreading results. Caramel can be made ahead of time (w/o the shredded coconut) and reheated in a double boiler.
As you can see, there are no instructions on how to complete the donuts. I dipped each donut in the chocolate & turned it upside down to let the chocolate harden (you can put it in the fridge if necessary). After the chocolate is hardened, I turned the donuts right side up (with the chocolate on the bottom) & spooned the caramel around the top – letting it slide off the sides.
I put the remaining chocolate into a disposable decorator bag (or you can use a Ziplock baggy as noted above) & drizzled it across the donuts. Let the chocolate harden & enjoy! I froze mine until the girls arrived & then we took out what we wanted every day and either ate them frozen or thawed?good either way!!!!!

 5. Add the eggs, buttermilk, vanilla and red food coloring to the sugar/oil mixture and stir to combine.


 8. Pour the batter evenly into the cake pans.


