by Jen_F | Coconut, Jen_F, Main Meal, Recipes
Sorry I don’t have nice pictures. Who knew I would end up sharing this recipe to more than just the family. lol – I do have not so pretty pics down below the article. Next time I make these I will try to remember to take pics as I go. ;-(
I made up this recipe as I went, so just go with your own style — change up the meat, use sausage of your choice, whatever … I’ve used Italian Sausage, turkey sausage and now chicken breast. If you’re a beef eater (which I am not), you could use ground beef or even shredded— same with pork)
You can mix match the beans (red, kidney, black, etc…)
… probably could use shredded cabbage instead of spinach ( I haven’t tried that but am sure it would work) or any vegetable or NO vegetable at all… I used to make them without- but add it now to give Deb a small amount of veggie.
The filling will fill about 24-28 6-8″ burritos and will freeze fine – for each burrito I use a heaping – I say LARGE-LARGE HEAPING tablespoon of the filling
If making for 2 people, I would say do one of three things:
#1 just throw in the serving size of meat you want, with beans, avocado, serving size of spinach, spices to taste and run with it.
#2 Divide the recipe into 3rds
#3 Or make the whole batch below, figure out how much you used for your taco shells or tortillas and then freeze the rest in that size portions.
… but below is what I do for my sister Deb once a month.
Filling:
(2 1/4 lb meat of choice) I used 3 large sized chicken breasts that weighed about 2 1/2 lbs total)- lightly boiled until done- sliced thin across the grain so it’s pretty fine pieces for the most part
Approximately 2 1/2 cups home cooked black beans/red kidney beans or 2 cans black beans/kidney beans STRAINED/drained
2 ripe avocados
Full bag of spinach (this is optional)
garlic, garlic, garlic and a little more garlic
(I use 5 or 6 cloves chopped up)
1 to 2 cup(s) shredded Mexican cheese (cheddar, Monterrey jack, most any cheese would work as I’ve used a variety over the last year)
2 TBS paprika
3 TBS cumin
3 TBS chili powder
1 TBS rubbed sage
1 TBS Oregano
1 tsp ground fennel (optional)
Mash the strained/drained beans
Mash the avocado
Lightly steam spinach and then let cool and squeeze out liquid
Slice, shred or chunk Chicken (your choice)
Dice up the Garlic (I do it to taste, so add or take away as much as you want or leave it out)
Throw everything into a big bowl, stir it up well to mix and then refridge overnight.
NOTE: Filling should be firm, not be ‘soupy’ which is why I drain the beans and squeeze out the spinach.
I let the filling stand in the fridge over night, then make the tortillas the next day.
Once the tortillas are made, get a large serving spoon, dollop a spoonful on the edge or the tortilla, roll it up like an enchilada and set aside. Move on to the next tortilla until they’ve all been filled.
Now you can freeze them (with rolled edge down) or brown them in the skillet and serve (but you don’t have to brown them if you don’t want to. I just like mine crispy on the outside)
Down below is a pic of them in the freezer. As you’ll see, I roll the edges in. It helps keep them from leaking out when browning.
I brown them on four sides, takes about 4-5 minutes for each of the four sides.
Sister Deb eats one at lunch most every day and it’s diabetic friendly.
To make Paleo flourless tortillas: (For the original recipe, go here)
~~~~
Makes: Four 6-8″ Mexican tortillas
Ingredients:
• 2 eggs
• 1 teaspoon melted coconut oil (or melted ghee)
• 1/8 teaspoon baking soda
• 1/4 cup arrowroot powder
• 1 teaspoon coconut flour
• Pinch of salt
* 1/2 tsp cumin
* 1/2 tsp chili powder
Directions:
Crack the eggs into a medium-sized bowl and whisk in the melted ghee.
Add the dry ingredients and beat well to combine. In a small (6-8″) skillet over medium heat, pour in about 1/4 of the batter and immediately roll it around to evenly coat the skillet- flip once it is set on top –(like cooking a pancake)
Here are two rough pics.
#1 I am not a photographer and only have a phone to take pics with
#2 Since I don’t use my ice maker, I took out the bucket and use that area for my freezing of things like this.

This pic is before the spinach is added
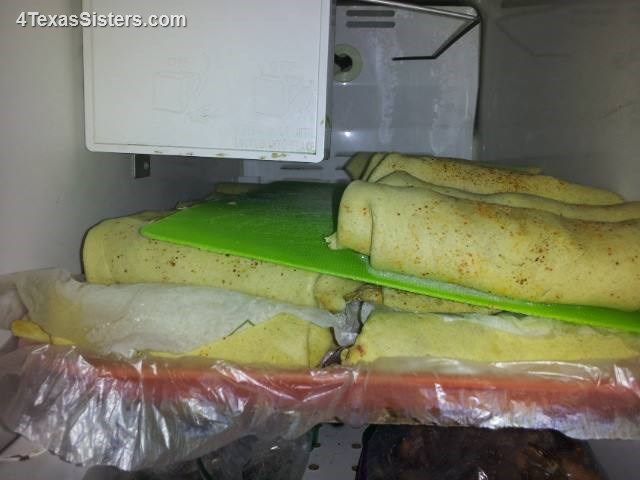
In the freezer. After they are frozen, I put them in baggies, ready to pull out, brown and eat.
by Jen_F | Coconut, Desserts, Jen_F, Recipes
I forget where we found the original recipe, but after a few changes here and there, I thought it worth sharing on our blog because it really is a great dairy-free, eggless, gluten free chocolate fudge brownie recipe.
Prep Time: 30 minutes (about)
Cook Time: 30-45 minutes
Yield: 16-20 dependent on the size of the slices
Ingredients:
3 oz. unsweetened baking chocolate
6 tbsp almond milk (you can substitute coconut milk here)
5 tbsp coconut oil
1 cup honey (vegan option: 1 cup maple syrup)
1 cup mashed cooked sweet potato (about 1 medium sweet potato)
(Note: You can substitute the sweet potato with Acorn Squash, Butternut Squash and even with Pumpkin)
1/2 tsp sea salt
1/2 tsp baking soda
6 tbsp unsweetened cocoa powder
6 tbsp coconut flour
6 tbsp tapioca flour
2 tsp vanilla extract
1/2 cup chocolate chips (optional- for a definitely sinfully chocolaty experience)
Other optional suggestions:
2 tsp Orange Extract (or to taste)
or 1 tsp Hazelnut Extract (or to taste)
or 1-2 tsp Raspberry Extract (or to taste)
1-2 tsp of instant coffee (flavored or plain — decaf or regular — or to taste)
Instructions
Preheat oven to 350 F.
If you don’t have already mashed cooked sweet potato, take one medium to large sweet potato and cut cut into 1-2″ pieces. Steam for about 30 minutes or until soft. Let the potato cool slightly then scrape the skin off from the sweet potato. Mash with a fork and then set aside 1 cup of mashed sweet potato.
(Sweet potatoes can be frozen also, so I steam several at a time and then prep, measure and freeze in 1 cup servings for a later use.
Some recipes call for microwaving your potato but personally if you’re a true health nut, we don’t mess around with the microwave as it changes the molecular structure of anything placed into it)
In a double boiler (or a metal mixing bowl resting in a pot of water), melt the unsweetened baking chocolate, almond milk and coconut oil over medium heat.
Once the chocolate has melted into a uniform mixture, remove from heat.
To the mixing bowl, add the honey or maple syrup, mashed sweet potato,vanilla, salt and baking soda. Blend well with hand immersion blender.
Slowly add the cocoa powder, coconut flour and tapioca powder and mix with a rubber spatula until uniform.
Optional – for double chocolate brownies, fold in half a cup of chocolate chips.
Pour batter into a 9″ x 9″ baking pan. Or round cake pan works nicely also.
Bake for 30 minutes or until testing with a toothpick or knife comes out clean.
Sometimes I have to bake them for up to 45 minutes. Since I’m not a scientist, I can’t tell you why the time varies.
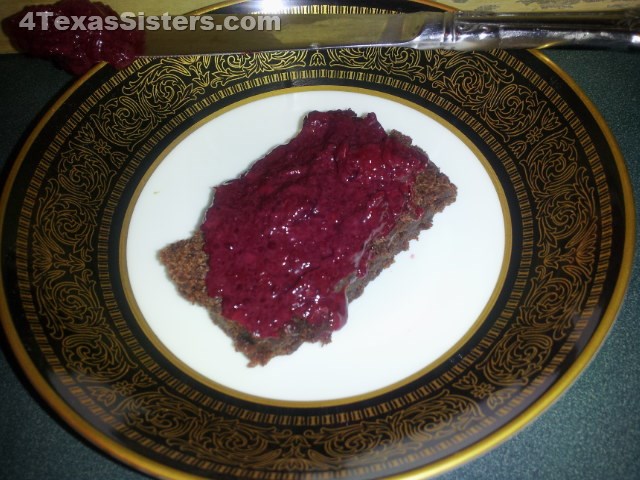
Cool and cut into squares. Enjoy!
These are great and have always been a crowd pleaser
A few weeks ago, Deb made homemade Raspberry and homemade Strawberry Jam using Chia…. which, by the way, is absolutely awesome spread on these delicious brownies.
Til the next time!
You’re never too young or too old .. So
Live Every Moment,
Love Beyond Words,
Laugh Everyday,
~Jennifer
by Jen_F | Coconut, How To, Jen_F, Musings
If you ever buy coconut and wonder why it might have a pinkish tinge to it, we learned what that’s all about this week.
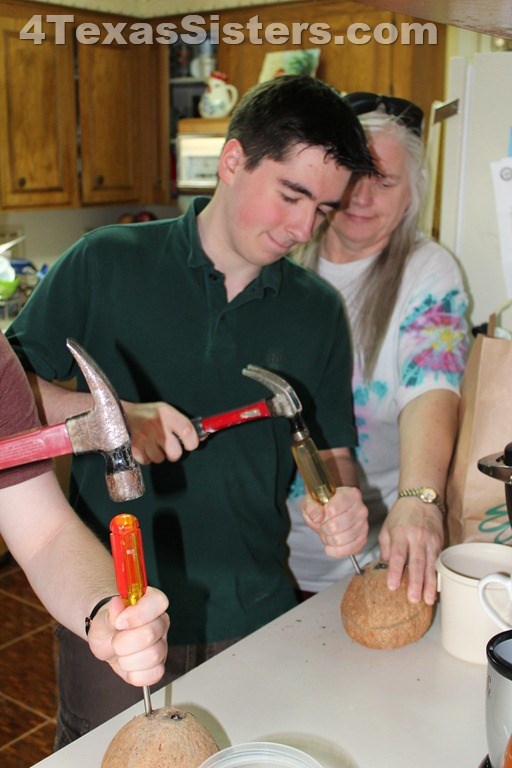
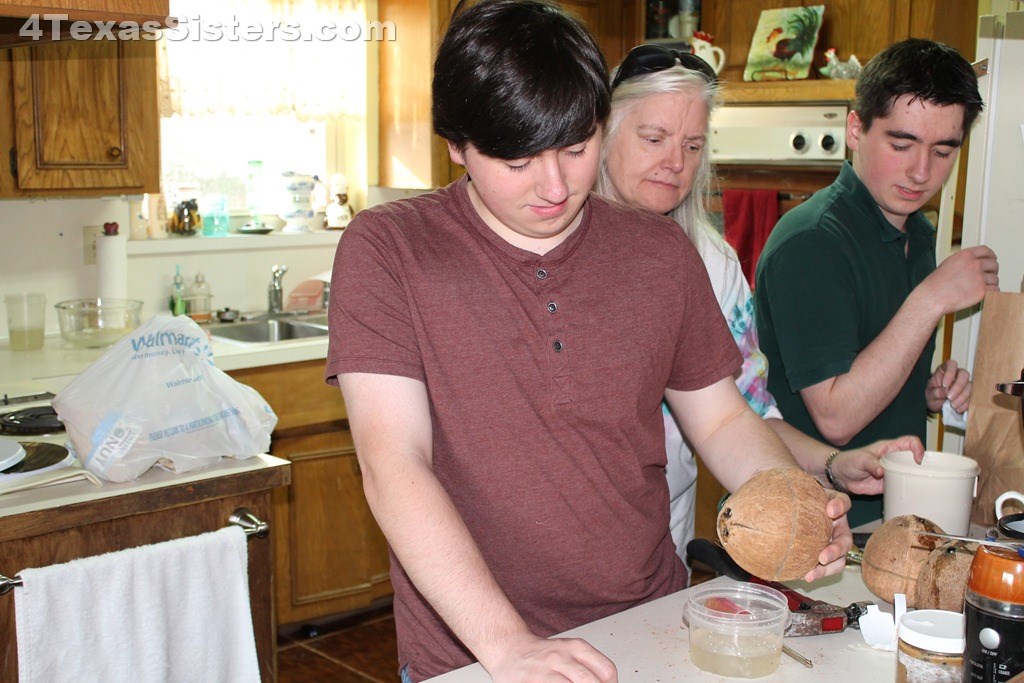
To set the stage, we were supposed to be going to visit our mother, but that got postponed. So, our main activity for the sister’s get together this month was MORE COCONUTS (oh and Deb hemming Ryan’s new pants for his first job)!
Shari purchased 12; Deb and I brought a total of 9. One of the 21 was bad, bad, bad, so we ended up with 20.
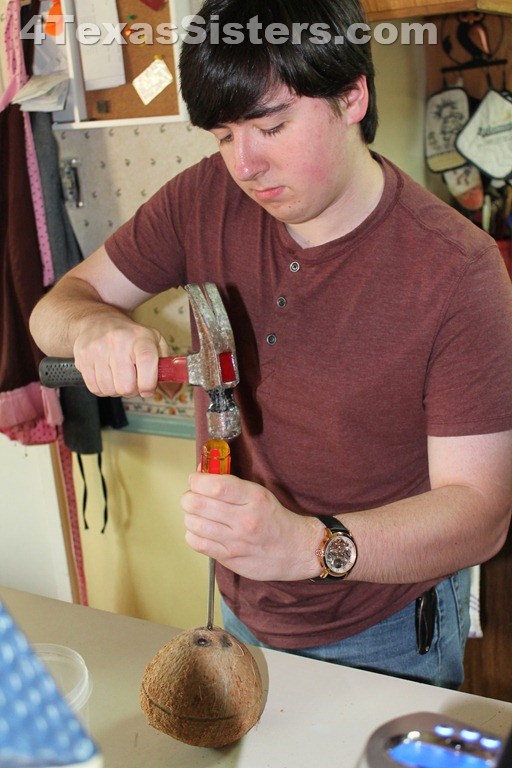
We did the regular process:
Extract the water from the coconut
Freeze over night
Crack the coconut
Extract the meat from the shell
Flake in the food processor
Dehydrate
During the dehydrate process, some of the flakes turned varying degrees of – from pink to rust red (looks brown in the picture, but that’s just the reaction to the flash on my camera). Some actually looked burned.

While we all guessed at what might be the cause, I finally did a bit of googling and found two sources that mention this strange phenomenon. We were fairly close in our guess(es) Here is what I got from Ask Dr. Coconut:
Occasionally you may purchase a coconut at the store and when you open it, you find the white meat or even the water has turned a red or pinkish color. At other times, this discoloration may develop after the coconut has been opened and has been sitting around for a time. This discoloration is more likely to happen the longer you keep the coconut and especially if it is not refrigerated.
At first thought you might think that it is mold or bacteria, but it is not. It is a natural chemical process caused by the oxidation of sugars in the coconut. When these sugars are exposed to oxygen they turn pink. Oxygen, temperature, duration of exposure, age, and sugar content of the coconut all play a part in this oxidation process. This is why some coconuts will turn color and others will not. Similar processes occur in other fruits as well. For example, when you slice an apple and leave it uncovered, the apple will turn brown. This is caused by oxidation.
If you put ascorbic acid (vitamin C) or lemon juice (which also contains vitamin C) on the apple it prevents it from turning brown. The same thing happens with coconut. Vitamin C acts as an antioxidant blocking the oxidation process.
In apples, as well as coconuts, this oxidation process is not harmful. You can eat a “browned” slice of apple without harm. Likewise, you can eat pink coconut without harm. I’ve done it and I’m still alive to tell about it. I know others who have eaten it without harm as well. Like with apples, the color does not affect the taste. If you don’t like the idea of eating pink coconut, then don’t, but it won’t hurt you.
http://www.coconutresearchcenter.com/hwnl_5-2.htm
None of ours showed any hint of discoloration until we started the dehydrating process. However, Deb, in all her ‘data /researching GREEN-NESS” is going to do an experiment using Vitamin C and will let us know the results, to include:
Will rinsing or soaking in vitamin C prior to dehydration:
- Prevent the discoloration during dehydration
- Affect the flavor of creating milk
- Affect the flavor and/or texture of making Coconut Cream.
Stay tuned for the results…. in the meantime….. eat up… it does not affect the taste. 
Til the next time…
You’re never too young or too old … So ……
Live Every Moment,
Love Beyond Words,
Laugh Everyday,
~Jennifer
by Shari | Coconut, Desserts, Musings, Recipes, Shari_T
It seems I have fallen behind on my postings, but things have been crazy around here. However, as Clay kindly pointed out, I say that as if it is somehow abnormal for life to be in a whirlwind in our house.
Okay, so I admit, life here is never exactly dull, but between injured possums in the garage, pushing vehicles down the street, preparing one of the twins for his first job (amazing how much there is to do to prepare for a job, and how much money it costs to go out and make money… lol), and the daily general wackiness of a house with twins (even if they are 18) and four dogs brings.
So, when I’ve not been running around like a mad woman, which is, admittedly, quite rare, I’ve found that I have become obsessed with all things coconut.
I’ve tried to move on, but I cannot: coconut pie, coconut cake, coconut candies, coconut oil, coconut cream, shredded coconut, coconut in my smoothies, coconut in my oatmeal, and the list goes on.
Which leads me to my first of several coconut confessions:
I’m a coconutaholic!
I’ve always loved coconut, but I was one of those poor souls who was raised to believe it was bad for you: full of fat and sugar. To some degree, this is true; the highly processed coconut sold in the baking isle of the grocery stores is full of fat and sugar, not to mention all the stuff I cannot pronounce.
But now, I’ve been introduced to numerous health benefits of pure, natural coconut, and have gone crazy trying to fit it into my daily life without creating a body as round as a coconut.
A great deal of my experimentation lately has been in learning to use purchased organic dehydrated coconut versus the fresh coconut we created last time Jen and Deb were here. The dehydrated shreds are a bit like straw, lacking the moistness you have with the fresh… Even the dehydrated fresh wasn’t as dry as the coconut you purchase.
When Deb and Jen were here, we found a wonderfully luscious recipe for healthy homemade Mounds candies at www.paleozing.blogspot.com. We used the fresh coconut that we had just processed at home, and there was a natural creaminess to the texture that I have been trying to recreate with the store bought organic coconut shreds.

For those who wish to use fresh coconut, here is the recipe as we made it:
- 1 Cup fresh shredded coconut
- 1/3 Cup coconut oil
- 3-4 medjool dates, pitted (or 6-8 regular dates)
- 1/2 teaspoon vanilla extract
- pinch of sea salt
- 1 Cup dark chocolate chips (we used Special Dark)
- Honey to taste (optional, if you are using regular dates as they are not as sweet as medjool dates)
Directions:
Step 1: In a small saucepan, heat coconut oil and coconut over low heat until the coconut begins to puff up. (Honestly, neither Deb nor I could figure out what this was supposed to look like, so we finally took it off the heat.)
Step 2: Place the dates, vanilla and salt into a blender or food processor (we used my Magic Bullet) and process until smooth and creamy.
Step 3: Mix the coconut mixture and the date mixture; stir in local raw honey or agave syrup for added sweetness, if needed/desired.
Step 4: Line a bread pan with parchment paper and pat mixture evenly into a bread pan and place in the freezer for about an hour, or until set.
Step 5: Melt the chocolate in the microwave in 30 second intervals, stirring after each cycle, until fully melted.
Step 6: Cut the candy into pieces (we made 24 pieces from our pan).
Step 7: Dip each piece into the chocolate and return to the parchment paper. Once all candies have been coated in chocolate, return to the freezer for 20 minutes, or until chocolate has set. (I actually do this in a 2-step procedure. I flip the block of frozen candy over and use a spatula to coat the bottom with chocolate, and then cut it into bars. I place it back in the freezer for 10 minutes, then hand dip the individual candies for the side and top coverage.)
Step 7: “ENJOY!” And, try not to eat all of it in one sitting. 

Next time, I’ll share my recipe for making these using the purchased organic dehydrated coconut shreds.
In my quest to recreate the texture of this original batch, and in generally working with purchased coconut, I came to my most embarrassing confession: I’d actually be willing to crack, hammer, freeze, scrape, shave, process and dehydrate fresh coconut with Jen and Deb a bit more often than when Hell freezes over for some of that luscious coconut meat.
So, until next time: eat well, enjoy life and live every day as if it was the most important!
Love,
Shari
by Deb D | Coconut, Deb_D, Desserts, Musings, Recipes
Are we nuts to do more coconuts? I hardly think so. There are so many good things that can be made with coconut in one form or another.
Have you ever seen a picture of something to eat that you wanted to make only to find that it didn’t turn out exactly like you thought it would? In my efforts to find a healthier way of eating, I stumbled upon a terrific website – www.tropicaltraditions.com.
(Note: They are a good information source about coconuts & have lots of recipes using this divine nut meat. Understand, I am in no way promoting their products.)
I must confess to having a terrible “sweet tooth.” So when I saw a picture of some German Chocolate Style Bars, I was hooked. No processed sugars, no dairy, no eggs, no gluten… The only hindrance in making them was that I had NO coconut cream/concentrate or ghee.
Hence, the additional coconuts Jen & I picked up on our way home from Shari’s – where we processed 13 coconuts! As Shari previously stated, whole coconuts are a very labor intensive proposition with very little reward – my 4 coconuts produced 1 1/4 lbs of shredded/sliced coconut.
After making the coconut concentrate (about 45 minutes), I was ready to make my chosen “goodie.” When we processed the coconut, Jen & I added a bit of coconut oil to hopefully speed up the process. All it appeared to do was add a layer of oil on top of the cream.
I made the bars according to the recipe – however, I did not chop the pecans finely enough so they were still in fairly large chunks. After the bars sat in the refrigerator for the requisite time, I pulled them out & cut them. (Question: How do you cut an 8×8 pan of cookie bars into 25 pieces?) It appeared that the coconut cream separated out of the base & was extremely oily; but it was good coconut oil!!! They were a bit chewy & oily.
After sampling the German Chocolate Style bars, I found out that my husband, Dale, doesn’t like coconut as much as I do. He has a problem with the excessive oil because of his dentures.
I have since drained the excess oil off of the coconut cream & I think it is much better. Since I have never purchased coconut cream before, I really have no idea of what it should look like but I think this is what I would imagine it should be.
In order to make these cookie bars, I had to make ghee (or clarified butter). It was not difficult..just a bit time consuming. I will add some commentary, pictures, & instructions on how I made it in another post as well as some Peanut Butter Cups that I made (dairy free, soy free, gluten free, egg free, & no processed sugar). Yummy!!!!!
by Shari | Coconut, Musings, Shari_T
Deb and Jen headed to Deb’s early this afternoon. We had a wonderful time experimenting with the coconuts, and we still managed to accomplish a few of the other things we had actually planned last time, like repairing a couple of quilts. Deb is the quilter; I have an aversion to all things sewing/needlework.
I am, however, trying to learn to do some basic needlework; I have just never liked it. Sewing, for example, has never moved me, at least when it comes to sewing clothing.
I see now, though, that there are some things for the house I’d like to be able to sew, such as pillows, tablecloths, etc. I’m trying to expand my horizons and try new things.
As for the coconut experience, I can honestly say that while it was interesting and amusing, I’ll be buying the finished products online in the future. That was just far too much hassle for my taste, as I just want to get to the business of putting it to use.
I have been warned that we will be doing it again at least once so Pat can participate. I can do that! I will have to be sure to mark Daniel’s and Ryan’s calendar for that week so they’re available to do all the “onerous manual labor.”
?? 

Actually cooking and/or baking with it was my favorite part. Okay, perhaps that was an overstatement: EATING the items we made was my favorite part! While I made the first evening’s dinner, Deb did the next two. So, I rounded out the meals by selecting the desserts using our coconuts.
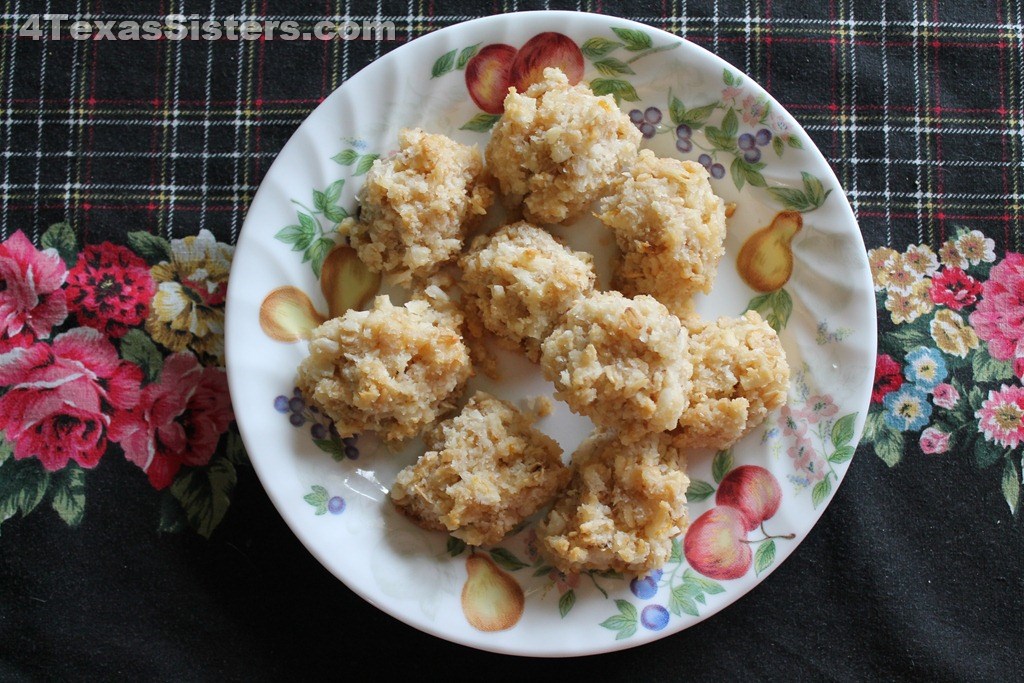
Tuesday night, I selected a recipe for some healthy coconut lemon macaroons, which were to take about 30 minutes from start to finish. You can start laughing now, because they took about 2 hours! The problem we had was that Jen selected some fresh coconut that had not yet been dried to try to make our coconut cream. It went through 3 processors and well over an hour before we finally gave up and decided to use whatever we had.
Note for the future: do not try to make coconut cream out of fresh, undried coconut. While it might be doable, it just didn’t work out with the equipment we had.
The good news is the cookies baked up well and were a huge hit, even with the boys! They were wonderfully moist and chewy with a hint of lemon. According to Daniel and Ryan, that’s a recipe to keep and repeat. That pretty much says it all in my house. If I make them again, I will cook them until they have a light brown dusting on the coconut on top; I think it would make them completely divine.
Give them a try; I think you’re going to love them, too!
What was the worst part of the whole coconut fest? How little was left after we baked with it! I have far too many things I want to use the coconut with for so little coconut in my cabinet.
My answer? I’m hording my fresh, homemade coconut for eating right out of the bag, or on oatmeal, etc. I’ll just have to find a good source for the coconut I’ll use in my recipes.
All this talk about food has made me hungry, so I think I’ll whip up some dinner with the leftover tomato/strawberry salsa and acorn squash Deb left from last night’s dinner.
Have a wonderful evening!
Love,
Shari


