by Jen_F | Blog, Jen_F, Recipes, Side Dishes
I’ve become somewhat of a purist along with Gluten free by choice, almost fat free by force.. and somewhere in the middle as far as proteins and carbs go.
If I still ate cornbread, this is the only way I would eat it …
Because ……
It’s quick,
It’s simple,
it’s absolutely, unequivocally delish ….
………. and if you ever invite me over and expect me to eat cornbread, this is the only way I’ll eat it, so be prepared. LOL
1 Box Jiffy Cornbread Mix
1 8oz container sour cream (lite works as well as the full fat/regular type sour cream)
4 eggs
Mix all ingredients in a bowl, pour into an 8×8 greased cake pan. Cook according to instructions on box.
It’s great with chili, soups, and any or dish you would normally serve with cornbread.
I even had a guest crumble it up and put it in milk for a dessert one time. I have to confess, I’d never seen that done, but he gave my cornbread rave reviews once it went into the milk.
It’s likely you could use yogurt or even a non-dairy replacement. I haven’t tried it, but do know the recipe is fairly forgiving.
So, in the mean time….
Live Every Moment, Love Beyond Words, Laugh Everyday,
~Jennifer
4TxSisters at Etsy
Visit my Youtube Channel
by Jen_F | Coconut, Jen_F, Main Meal, Recipes
Sorry I don’t have nice pictures. Who knew I would end up sharing this recipe to more than just the family. lol – I do have not so pretty pics down below the article. Next time I make these I will try to remember to take pics as I go. ;-(
I made up this recipe as I went, so just go with your own style — change up the meat, use sausage of your choice, whatever … I’ve used Italian Sausage, turkey sausage and now chicken breast. If you’re a beef eater (which I am not), you could use ground beef or even shredded— same with pork)
You can mix match the beans (red, kidney, black, etc…)
… probably could use shredded cabbage instead of spinach ( I haven’t tried that but am sure it would work) or any vegetable or NO vegetable at all… I used to make them without- but add it now to give Deb a small amount of veggie.
The filling will fill about 24-28 6-8″ burritos and will freeze fine – for each burrito I use a heaping – I say LARGE-LARGE HEAPING tablespoon of the filling
If making for 2 people, I would say do one of three things:
#1 just throw in the serving size of meat you want, with beans, avocado, serving size of spinach, spices to taste and run with it.
#2 Divide the recipe into 3rds
#3 Or make the whole batch below, figure out how much you used for your taco shells or tortillas and then freeze the rest in that size portions.
… but below is what I do for my sister Deb once a month.
Filling:
(2 1/4 lb meat of choice) I used 3 large sized chicken breasts that weighed about 2 1/2 lbs total)- lightly boiled until done- sliced thin across the grain so it’s pretty fine pieces for the most part
Approximately 2 1/2 cups home cooked black beans/red kidney beans or 2 cans black beans/kidney beans STRAINED/drained
2 ripe avocados
Full bag of spinach (this is optional)
garlic, garlic, garlic and a little more garlic
(I use 5 or 6 cloves chopped up)
1 to 2 cup(s) shredded Mexican cheese (cheddar, Monterrey jack, most any cheese would work as I’ve used a variety over the last year)
2 TBS paprika
3 TBS cumin
3 TBS chili powder
1 TBS rubbed sage
1 TBS Oregano
1 tsp ground fennel (optional)
Mash the strained/drained beans
Mash the avocado
Lightly steam spinach and then let cool and squeeze out liquid
Slice, shred or chunk Chicken (your choice)
Dice up the Garlic (I do it to taste, so add or take away as much as you want or leave it out)
Throw everything into a big bowl, stir it up well to mix and then refridge overnight.
NOTE: Filling should be firm, not be ‘soupy’ which is why I drain the beans and squeeze out the spinach.
I let the filling stand in the fridge over night, then make the tortillas the next day.
Once the tortillas are made, get a large serving spoon, dollop a spoonful on the edge or the tortilla, roll it up like an enchilada and set aside. Move on to the next tortilla until they’ve all been filled.
Now you can freeze them (with rolled edge down) or brown them in the skillet and serve (but you don’t have to brown them if you don’t want to. I just like mine crispy on the outside)
Down below is a pic of them in the freezer. As you’ll see, I roll the edges in. It helps keep them from leaking out when browning.
I brown them on four sides, takes about 4-5 minutes for each of the four sides.
Sister Deb eats one at lunch most every day and it’s diabetic friendly.
To make Paleo flourless tortillas: (For the original recipe, go here)
~~~~
Makes: Four 6-8″ Mexican tortillas
Ingredients:
• 2 eggs
• 1 teaspoon melted coconut oil (or melted ghee)
• 1/8 teaspoon baking soda
• 1/4 cup arrowroot powder
• 1 teaspoon coconut flour
• Pinch of salt
* 1/2 tsp cumin
* 1/2 tsp chili powder
Directions:
Crack the eggs into a medium-sized bowl and whisk in the melted ghee.
Add the dry ingredients and beat well to combine. In a small (6-8″) skillet over medium heat, pour in about 1/4 of the batter and immediately roll it around to evenly coat the skillet- flip once it is set on top –(like cooking a pancake)
Here are two rough pics.
#1 I am not a photographer and only have a phone to take pics with
#2 Since I don’t use my ice maker, I took out the bucket and use that area for my freezing of things like this.

This pic is before the spinach is added
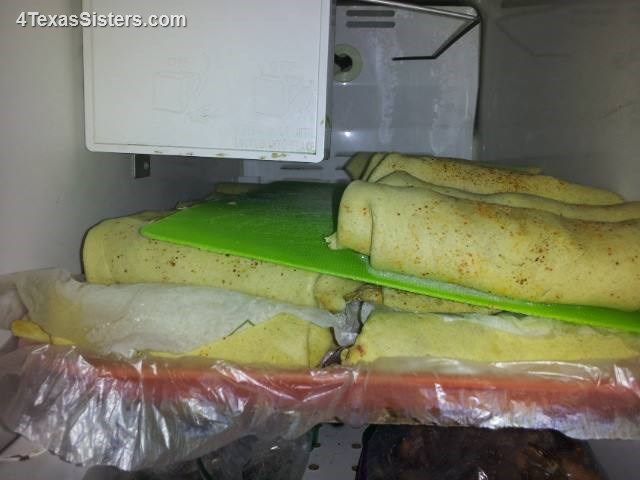
In the freezer. After they are frozen, I put them in baggies, ready to pull out, brown and eat.
by Jen_F | Coconut, Desserts, Jen_F, Recipes
I forget where we found the original recipe, but after a few changes here and there, I thought it worth sharing on our blog because it really is a great dairy-free, eggless, gluten free chocolate fudge brownie recipe.
Prep Time: 30 minutes (about)
Cook Time: 30-45 minutes
Yield: 16-20 dependent on the size of the slices
Ingredients:
3 oz. unsweetened baking chocolate
6 tbsp almond milk (you can substitute coconut milk here)
5 tbsp coconut oil
1 cup honey (vegan option: 1 cup maple syrup)
1 cup mashed cooked sweet potato (about 1 medium sweet potato)
(Note: You can substitute the sweet potato with Acorn Squash, Butternut Squash and even with Pumpkin)
1/2 tsp sea salt
1/2 tsp baking soda
6 tbsp unsweetened cocoa powder
6 tbsp coconut flour
6 tbsp tapioca flour
2 tsp vanilla extract
1/2 cup chocolate chips (optional- for a definitely sinfully chocolaty experience)
Other optional suggestions:
2 tsp Orange Extract (or to taste)
or 1 tsp Hazelnut Extract (or to taste)
or 1-2 tsp Raspberry Extract (or to taste)
1-2 tsp of instant coffee (flavored or plain — decaf or regular — or to taste)
Instructions
Preheat oven to 350 F.
If you don’t have already mashed cooked sweet potato, take one medium to large sweet potato and cut cut into 1-2″ pieces. Steam for about 30 minutes or until soft. Let the potato cool slightly then scrape the skin off from the sweet potato. Mash with a fork and then set aside 1 cup of mashed sweet potato.
(Sweet potatoes can be frozen also, so I steam several at a time and then prep, measure and freeze in 1 cup servings for a later use.
Some recipes call for microwaving your potato but personally if you’re a true health nut, we don’t mess around with the microwave as it changes the molecular structure of anything placed into it)
In a double boiler (or a metal mixing bowl resting in a pot of water), melt the unsweetened baking chocolate, almond milk and coconut oil over medium heat.
Once the chocolate has melted into a uniform mixture, remove from heat.
To the mixing bowl, add the honey or maple syrup, mashed sweet potato,vanilla, salt and baking soda. Blend well with hand immersion blender.
Slowly add the cocoa powder, coconut flour and tapioca powder and mix with a rubber spatula until uniform.
Optional – for double chocolate brownies, fold in half a cup of chocolate chips.
Pour batter into a 9″ x 9″ baking pan. Or round cake pan works nicely also.
Bake for 30 minutes or until testing with a toothpick or knife comes out clean.
Sometimes I have to bake them for up to 45 minutes. Since I’m not a scientist, I can’t tell you why the time varies.
Cool and cut into squares. Enjoy!
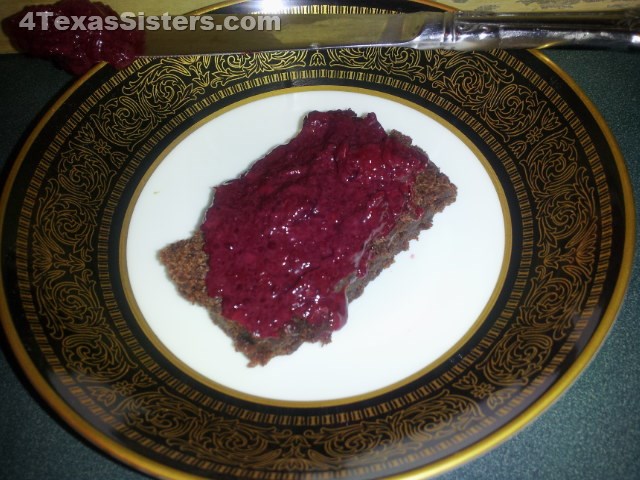
These are great and have always been a crowd pleaser
A few weeks ago, Deb made homemade Raspberry and homemade Strawberry Jam using Chia…. which, by the way, is absolutely awesome spread on these delicious brownies.
Til the next time!
You’re never too young or too old .. So
Live Every Moment,
Love Beyond Words,
Laugh Everyday,
~Jennifer
by Jen_F | Fruit, How To, Jen_F
I love apples as a snack and so I’ll cut them up, put them in a plastic container and then snack from the container throughout the day.
This works at home, but when I’m traveling, I hate carrying that extra, really needless, container around, so I dump all my sliced apple pieces in a baggie and of course, by time I am ready to eat my apple, it’s turned brown.
I saw this somewhere recently and just had to try it –
You’ll need four things:

Cutting board
Apple Cutter
Rubber Band
Baggie
Wash your Apple

Slice it

Put it back together, then put it in your plastic bag and you’re ready to travel.

It’s great for kid’s lunch boxes too.
Til the next time!
You’re never too young or too old! So…
Live Every Moment,
Love Beyond Words,
Laugh Everyday,
~Jennifer
by Deb D | Deb_D, Recipes
One of the best Mexican food dishes I like (and like to make) is Chile Rellenos either stuffed with cheese alone or with a combination of meat & cheese.
I usually make my Chile Rellenos with Anaheim peppers but they are quite tasty made with Pablano peppers. First I roast the peppers & chill them in ice water to stop the cooking. I slit the pepper open and scrape out as many of the seeds & veins as I can so they are not quite sooooo hot!!!
Usually I cut a block of Colby Jack cheese into strips and stuff at least one strip in each pepper. If I am adding meat, this is the time to fill them.
To make the batter, I usually use the same number of eggs that I have peppers. If I make 4 peppers, I use four eggs, at room temperature. Divide the yolk from the white. Add about 1 tsp flour per pepper, 1/2 tsp salt, pepper to taste, & 1 tsp of Season Salt, 1 tsp cumin. Whip the egg whites, with 1 tsp of Cream of Tatar, to stiff peaks.
Add about a “big” spoonful of the egg whites to the egg yolk mixture to thin it out.? Gently fold the yolks into the whites so as not to break the fluffiness.
I heat oil (lard, about an inch)in a large skillet. I use a ladle to pour some batter on top of the heated oil. Be sure to pour enough so that the pepper can lay across it without having the pepper in the oil. Lay the pepper on the batter base & spoon more batter over the top of the pepper. Using a spoon (or ladle), scoop oil across the enclosed pepper. This will provide some stability when you turn the pepper. I use a silicon covered spatula to turn the peppers. After the bottom browns, carefully turn the pepper and let the pepper turn golden brown. Use the spatula to move the cooked pepper to a paper towel covered plate. Serve immediately.
by Jen_F | Desserts, Glycemic Index, Jen_F, Recipes
(Originally known as the No Bake Chocolate Cookie)
If you ever did ANY “Sweet treat” cooking in your house, you probably, at one time, whipped up those great little no-bake chocolate cookies that had peanut butter, cocoa, sugar, evaporated milk, vanilla, oatmeal and nuts were optional. Some people even put shredded coconut in them. If you fixed too many of these tasty morsels, you probably over-cooked, under-cooked or just in general had BAD batches. OR Maybe I’m just the only one.
They were fairly quick to fix and yummy to eat, bad batch or not. HOWEVER, they aren’t the most healthy thing, ranking pretty high on the Glycemic Index charts, what with all that sugar.
When I started cutting down my sugar intake, started educating myself on what those things on the label of our foods we buy at the store really mean and stopped buying processed foods (for the most part), my already limited ability to have something sweet declined even more. So, the hunt started.
I can’t honestly say where I got the original recipe for these great tasting No-Bake cookies and I’ve messed with the recipe more than once, but can tell you they will be more kind to your low glycemic needs than the original recipe. So, here we go.
Even if you are diabetic, you’ll be able to eat these delicious little cookie / candy bites. I use Raw Honey most of the time (see below for substitutions). Since the mixture never gets heated, we’re not cooking the health benefits of the Raw Honey out of the mix.
Here’s also the breakdown:
 1/2 c Sunbutter, Almond Butter or Peanut Butter
1/2 c Raw Honey or Agave Syrup (if using Stevia, just flavor to taste, they’ll be fine. If you use Stevia and need more liquid to replace the honey, add a little more coconut oil.)
1/2 c Melted Coconut oil
1 Tbsp Pure Vanilla
A sprinkle of Sea Salt
2 c Shredded Unsweetened Coconut (or flaked)
Mix everything together in a bowl except the coconut. Once you’ve got it all blended, stir in the coconut.
— Optional: 2 Tbsp Cocoa Powder (regular or dark works just as well. So does a mix of the two.) And you’re back to the original (healthier style-Low Glycemic) No Bake Chocolate Cookies. (See that recipe here)
I use a round Tbsp to scoop out rounded balls, place them on a tray lined with plastic or parchment paper. Freeze for about an hour then eat. These can be kept in the freezer or refrigerator, but because of the coconut oil, they will get soft if left out on a warm day.
Makes about 25 cookies .(If you noticed in the picture below I’ve got my Dark Hershey’s Cocoa version ready for the freezer.)

These are great little power balls packed with nutritious, fresh ingredients that will NOT blow your diet program. As with anything, do eat them with moderation. I’d hate for you to write me and say my sweet treats ruined your diet. LOL
By the way, if you’re a dark cocoa fan, jump right in and do the substitution. You may want to cut back the cocoa to 1 1/2 Tbsp though and if you’re not only a cocoa freak but a sweetie too, you can increase the honey by adding up to 2 more Tbsp without making it an ooie-gooie mess that won’t keep its shape.
I only use Sunbutter. Peanut butter has more oil and may make them a bit more runny, so to be on the safe side, you might want to add your oil a little at a time.
If it IS ooie-gooie, just pour them out on a lined cookie sheet, refrigerate for about 5 minutes, score with a dinner knife in the sizes you want, then freeze.
Here they are in bars along with some of the chocolate version. And remember —— Keep them either in the fridge or freezer, otherwise, on a warm day, you might need a spoon. LOL


BON APPETIT
Til the next time!
You’re never too young or too old! So…
Live Every Moment,
Love Beyond Words,
Laugh Everyday,
~Jennifer


