by Jen_F | Coconut, Desserts, Jen_F, Recipes
I forget where we found the original recipe, but after a few changes here and there, I thought it worth sharing on our blog because it really is a great dairy-free, eggless, gluten free chocolate fudge brownie recipe.
Prep Time: 30 minutes (about)
Cook Time: 30-45 minutes
Yield: 16-20 dependent on the size of the slices
Ingredients:
3 oz. unsweetened baking chocolate
6 tbsp almond milk (you can substitute coconut milk here)
5 tbsp coconut oil
1 cup honey (vegan option: 1 cup maple syrup)
1 cup mashed cooked sweet potato (about 1 medium sweet potato)
(Note: You can substitute the sweet potato with Acorn Squash, Butternut Squash and even with Pumpkin)
1/2 tsp sea salt
1/2 tsp baking soda
6 tbsp unsweetened cocoa powder
6 tbsp coconut flour
6 tbsp tapioca flour
2 tsp vanilla extract
1/2 cup chocolate chips (optional- for a definitely sinfully chocolaty experience)
Other optional suggestions:
2 tsp Orange Extract (or to taste)
or 1 tsp Hazelnut Extract (or to taste)
or 1-2 tsp Raspberry Extract (or to taste)
1-2 tsp of instant coffee (flavored or plain — decaf or regular — or to taste)
Instructions
Preheat oven to 350 F.
If you don’t have already mashed cooked sweet potato, take one medium to large sweet potato and cut cut into 1-2″ pieces. Steam for about 30 minutes or until soft. Let the potato cool slightly then scrape the skin off from the sweet potato. Mash with a fork and then set aside 1 cup of mashed sweet potato.
(Sweet potatoes can be frozen also, so I steam several at a time and then prep, measure and freeze in 1 cup servings for a later use.
Some recipes call for microwaving your potato but personally if you’re a true health nut, we don’t mess around with the microwave as it changes the molecular structure of anything placed into it)
In a double boiler (or a metal mixing bowl resting in a pot of water), melt the unsweetened baking chocolate, almond milk and coconut oil over medium heat.
Once the chocolate has melted into a uniform mixture, remove from heat.
To the mixing bowl, add the honey or maple syrup, mashed sweet potato,vanilla, salt and baking soda. Blend well with hand immersion blender.
Slowly add the cocoa powder, coconut flour and tapioca powder and mix with a rubber spatula until uniform.
Optional – for double chocolate brownies, fold in half a cup of chocolate chips.
Pour batter into a 9″ x 9″ baking pan. Or round cake pan works nicely also.
Bake for 30 minutes or until testing with a toothpick or knife comes out clean.
Sometimes I have to bake them for up to 45 minutes. Since I’m not a scientist, I can’t tell you why the time varies.
Cool and cut into squares. Enjoy!
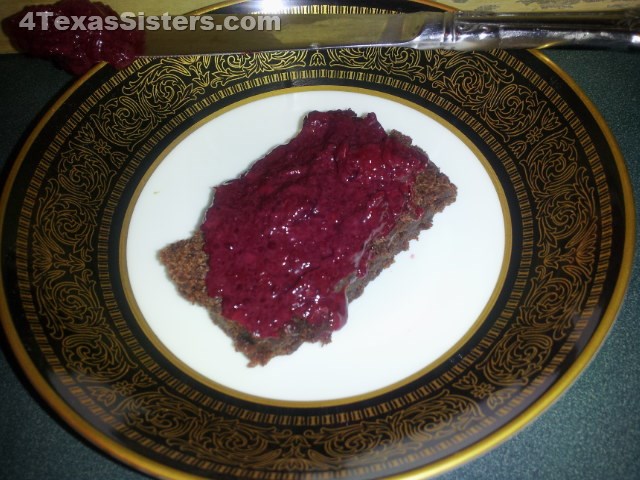
These are great and have always been a crowd pleaser
A few weeks ago, Deb made homemade Raspberry and homemade Strawberry Jam using Chia…. which, by the way, is absolutely awesome spread on these delicious brownies.
Til the next time!
You’re never too young or too old .. So
Live Every Moment,
Love Beyond Words,
Laugh Everyday,
~Jennifer
by Jen_F | Desserts, Glycemic Index, Jen_F, Recipes
(Originally known as the No Bake Chocolate Cookie)
If you ever did ANY “Sweet treat” cooking in your house, you probably, at one time, whipped up those great little no-bake chocolate cookies that had peanut butter, cocoa, sugar, evaporated milk, vanilla, oatmeal and nuts were optional. Some people even put shredded coconut in them. If you fixed too many of these tasty morsels, you probably over-cooked, under-cooked or just in general had BAD batches. OR Maybe I’m just the only one.
They were fairly quick to fix and yummy to eat, bad batch or not. HOWEVER, they aren’t the most healthy thing, ranking pretty high on the Glycemic Index charts, what with all that sugar.
When I started cutting down my sugar intake, started educating myself on what those things on the label of our foods we buy at the store really mean and stopped buying processed foods (for the most part), my already limited ability to have something sweet declined even more. So, the hunt started.
I can’t honestly say where I got the original recipe for these great tasting No-Bake cookies and I’ve messed with the recipe more than once, but can tell you they will be more kind to your low glycemic needs than the original recipe. So, here we go.
Even if you are diabetic, you’ll be able to eat these delicious little cookie / candy bites. I use Raw Honey most of the time (see below for substitutions). Since the mixture never gets heated, we’re not cooking the health benefits of the Raw Honey out of the mix.
Here’s also the breakdown:
 1/2 c Sunbutter, Almond Butter or Peanut Butter
1/2 c Raw Honey or Agave Syrup (if using Stevia, just flavor to taste, they’ll be fine. If you use Stevia and need more liquid to replace the honey, add a little more coconut oil.)
1/2 c Melted Coconut oil
1 Tbsp Pure Vanilla
A sprinkle of Sea Salt
2 c Shredded Unsweetened Coconut (or flaked)
Mix everything together in a bowl except the coconut. Once you’ve got it all blended, stir in the coconut.
— Optional: 2 Tbsp Cocoa Powder (regular or dark works just as well. So does a mix of the two.) And you’re back to the original (healthier style-Low Glycemic) No Bake Chocolate Cookies. (See that recipe here)
I use a round Tbsp to scoop out rounded balls, place them on a tray lined with plastic or parchment paper. Freeze for about an hour then eat. These can be kept in the freezer or refrigerator, but because of the coconut oil, they will get soft if left out on a warm day.
Makes about 25 cookies .(If you noticed in the picture below I’ve got my Dark Hershey’s Cocoa version ready for the freezer.)

These are great little power balls packed with nutritious, fresh ingredients that will NOT blow your diet program. As with anything, do eat them with moderation. I’d hate for you to write me and say my sweet treats ruined your diet. LOL
By the way, if you’re a dark cocoa fan, jump right in and do the substitution. You may want to cut back the cocoa to 1 1/2 Tbsp though and if you’re not only a cocoa freak but a sweetie too, you can increase the honey by adding up to 2 more Tbsp without making it an ooie-gooie mess that won’t keep its shape.
I only use Sunbutter. Peanut butter has more oil and may make them a bit more runny, so to be on the safe side, you might want to add your oil a little at a time.
If it IS ooie-gooie, just pour them out on a lined cookie sheet, refrigerate for about 5 minutes, score with a dinner knife in the sizes you want, then freeze.
Here they are in bars along with some of the chocolate version. And remember —— Keep them either in the fridge or freezer, otherwise, on a warm day, you might need a spoon. LOL


BON APPETIT
Til the next time!
You’re never too young or too old! So…
Live Every Moment,
Love Beyond Words,
Laugh Everyday,
~Jennifer
by Deb D | Deb_D, Desserts, Recipes
Well, I am NOT a baker (especially of cakes) but Shari has tasked me with making her wedding cake in January of next year.
It is covered with fondant & until last month I had never been closer to fondant than eating it on a cake someone else made & admiring the beauty. So I had a crash course as Shari’s at our last month’s get-together.
I found that it is not TOOOOOO hard to work with..you just have to know what to do with it. I didn’t find out all about it until I worked with it at home on my own.
When Jen was here last weekend to do karaoke at the VFW, I made my practice cake & fondants. Part of the cake (the little top one) has a store bought (Duff Goldman of Ace of Cakes) fondant & the larger one has a home made marshmallow fondant. That in itself was soooo much fun!
I had Shari email me the recipe so I could make it. It is water, marshmallows, & powdered sugar. Needless to say it was a MESS. I had powdered sugar all over me, the counter, & the bowl (where the fondant was).
I should have done a bit of research before I started rolling it out – found out I should have been using powdered sugar to roll it on & NEVER knead it like bread. I got air bubbles in my fondant when I tried to roll it. Jen did a bit of research for me & found that I should not be folding it over on itself as this incorporates air – duh.
The cake is a Red Velvet (box mix) by Duff Goldman (as mentioned above). I have never been much of a cake baker so I had forgotten that cakes sometimes have lots of air bubbles in them. The chocolate cake I made for my granddaughter’s birthday in July was not too bad but the practice one I made at Shari’s was HORRIBLY bubbly, like Swiss cheese or a sponge.
Anyway, cakes were made – 8″ & 9″ cakes, frozen. Frosting made for the cake & decorator’s icing – my refrigerators were definitely on sugar overload.
In order to roll out the fondant, Shari loaned me her Wilton Fondant mat – which helped a lot..gave me sizes to roll out to be sure it would cover the cake.
I bought a 19″ x 2″ wooden rolling pin (it says it’s a rolling dowel). This will be big enough to cover almost any cake.
Fondants rolled, flowers made (the marshmallow flower was easier to mold but the store bought fondant flower kept its shape better).
Cakes assembled, straws placed for strength, layers laid. Next, what to do about the ribbon thing. I sure hope Shari has a ribbon cutter, if not..OH, BOY!!!!..lol
For those of you who might not know me, I am the studious, meticulous, straight by the book person so when it came time to finish putting the cake together, it was a nightmare – not really.
It was hard to tell exactly how the cake was put together so I did the best I could and I think, after the cakes were together, that the little one should have been slightly off-center. I couldn’t get the calla lily to lay on the bottom layer like the picture showed. Also, instead of the silver decoration, I just used white decorator icing, mostly for effect as I didn’t have the stuff to make it silver.
Jen said she thinks Shari is going to want the ribbon to be the red she picked for her wedding. I told her I didn’t know but that I was going to make it look as close to the picture as possible that other stuff can be done on the OFFICIAL cake. 
Now for the pearls .Shari said they are EASY. lol I went to the internet for some instruction & couldn’t find a lot other than to use fondant pearls. The pearls around the upper cake were done with decorator icing & the ones around the bottom were fondant circles cut with my larger straight decorating tip.
Here is the picture:
Now, how did it taste? On Friday, I cut the cake & what a mess. In order to cut the bottom cake, I had to remove the upper cake. Both cakes are on cardboard covered with aluminum foil (had no decorators foil). I forgot to put something on the bottom of the upper cake so when lifted it off the fondant & icing from the bottom cake came off with the top. 
I took the top cake off of the cardboard & set it on a paper plate while I repaired the bottom cake. As long as no one else saw it, no problem lol. Setting the top cake back down helped.
My husband, Dale said it was okay but a little dry (the thing had been sitting in the fridge or freezer for almost a week-what do you expect lol). It had really good flavor but Dale said the fondant was too thick. I said I rolled it out to 1/8″ like Shari said. He said it’s more like 1/4″. What happened??????? The icing under the cake had melded in with the fondant to make it look like the fondant was way too thick.
Personally, I thought the whole cake was just fine. I KNOW the plates are a bit busy lol.
That’s all for the Perils from the Kitchen for now!
The cake design is from Rose Levy Bernbaum’s “The Cake Bible.” You can find more of her designs at http://www.realbakingwithrose.com
by Shari | Desserts, Recipes, Shari_T
Great Cake Bake – Day 4
By now, you have probably read the “Great Cake Bake Day 3” story and know that there are to be no photos.
Boot up “The Twilight Zone” theme song here, because now the story really goes off the edge.
I wanted to obtain a photo I knew was on that card, so I put it in the SD slot, Windows brought up the menu and I selected to view the photos we’d taken!
So, I closed that window and went to the computer to copy them.
They were gone. AGAIN!
Now, I was getting frustrated. I was good humored about not having them at all, but this was just plain aggravating.
Long story short, as if it isn’t already too long, when I switched from one camera to the other, Daniel’s camera opened its own file. That file was separate from the one that had my camera files. I never open the other files, so it never occurred to me until I realized they had to be there somewhere.
Soooooooo, they were there all along.
Now, that’s hilarious!
So, now we’re going on with the show.
******
By now, the guys are tired of just sampling the crumbs of crust I cut off each cake to level it. So, I took a tiny bowl that is shaped like a cake pan and used a bit of batter in it to give us a chance to really taste the cake. So far, they’ve enjoyed the cakes, even without any fillings or icings. If they don’t offer an opinion, I ask for one, and generally, their thoughts have been in line with my own; the apple doesn’t fall far, I suppose.
Today’s cake comes from a recipe by confectionarydesigns.com.
I’m not generally crazy about white cakes, but while searching for a white chocolate cake, I found this one. The recipe looked simple enough with only 7 ingredients, and the simple, but elegant design of the wedding cake peaked my interest.
Sometimes, simple is best.
- Ingredients
- 1-1/2 cups butter, room temperature
- 1-1/2 cups granulated sugar
- 2 large eggs
- 1 cup buttermilk
- 1 teaspoon baking soda
- 2 cups all purpose flour
1/2 teaspoon salt
1. Preheat oven to 325 degrees.
2. Grease and flour two 8-inch pans. (I used 9″ with good results.)
3. Sift together flour and salt; set aside.
4. Cream butter and sugar until light and fluffy. This may take 4-5 minutes.
5. Add eggs, one at a time, and mix well after each addition.
6. Dissolve baking soda in buttermilk.
7. Alternately add flour and buttermilk, beginning and ending with the flour mixture.
8. Bake approximately 30 minutes, or until a toothpick inserted in the middle comes out clean.
9. Cool cakes 10 minutes, then invert onto a wire cooling tray.
This recipe made a moist, light, delicate cake with a wonderful taste. This is a keeper of a recipe, and I’d definitely use this for a wedding or other special occasion.
But, let’s be clear: if you’re expecting a pure white cake, this is not it. This cake is a yellow butter cake. Thankfully, its color is not important to me.
I’m anxious to see how it handles the fillings and icings.
Oooo, I can’t wait!
Love,
Shari
by Shari | Desserts, Recipes, Shari_T
I have to say that everything went smoothly today; no mishaps with lost (or found) photos or additional broken bowls.
In fact, this cake went together quickly and easily. I can see it becoming a favorite of ours here at home for that reason alone.
Well, okay, it also tasted pretty darn good, too.
The recipe was found on www.myrecipes.com, where you can see the original recipe, without my changes.
Ingredients
- 1/2 cup butter, softened
- 1/2 cup coconut oil
- 2 cups sugar
- 5 large eggs, separated
- 2 teaspoons vanilla extract
- 1-1/2 teaspoons almond extract
- 2 cups all-purpose flour
- 1 teaspoon baking soda
- 1 cup buttermilk
Directions
1. Beat the butter and coconut oil on medium speed with an electric mixer until fluffy.
2. Gradually add sugar, beating well to incorporate.
3. Add egg yolks, one at a time, beating until blended after each addition.
4. Add vanilla and almond extracts; beat until blended.
5. Combine flour and baking soda, and add to butter mixture alternately with buttermilk. Begin and end with the flour mixture, beating on low speed until blended after each addition.
6. Beat egg whites until stiff peaks form, and fold into the batter.
(Okay, I admit it, I overbeat mine this time. It didn’t seem to make any significant difference in the final outcome of the cake. That’s my story, and I’m sticking to it.)
7. Divide into 2 8-inch (I used 9-inch with excellent results), greased and floured cake pans.
8. Bake at 325 degrees for approximately 30-35 minutes.
9. Let pans cool 10 minutes before inverting them onto a cooling rack.
This cake had a very light texture and it held together well. It was moist and tender.
In a word: delicious!
Can’t wait to see what’s next. Oh, wait – I already know. LOL!
Until then!
Love,
Shari
by Shari | Desserts, Musings, Recipes, Shari_T
Life is about perspective.
All the cakes are made, marked and in the freezer ready to be filled, glazed, iced, etc. I even squeezed in a second round of the Red Velvet cake to test it with less oil.
No problems there.
Largely, all the cakes were relatively easy to do, but the last 2 actually took both mixers, gobs of bowls and one a double boiler. The first 2 cakes are posted on the blog, with detailed photos.
When I started this process, I switched to Daniel’s camera because he never uses it. I don’t like using mine because I am afraid of getting food, oil, flour dust, etc., into it.
While it was a Christmas gift, I know it was in the neighborhood of $1,000, whereas Daniel’s was in the neighborhood of $150. I’d rather ruin that one if I’m dropping it in some batter or a pan of boiling water.
Now, with no worries about ruining my camera, I diligently pressed forward taking photos and baking the remainder of the cakes. I even enlisted Daniel for the last 2 cakes because I’m still new at this (cooking/baking and photo taking), and what should have been a few minutes of time from mixer to oven, was taking up to 2 hours.
So, Daniel took the photos of the last 2 days of cakes. The cakes went together quickly even with some additional steps, like melting chocolate and whipping egg whites.
I had time to put the first 2 days of photos on my computer, but thereafter, I just was too busy. I spent all day today catching up on the blogs, and was working to try to get at least a day ahead.
Then, it came time to add the photos to blog 3. Photos – you know, all those hundreds we took using Daniel’s camera.
THERE ARE NONE!!!
The last photo on his camera was taken the first evening after I cooked the first 2 cakes. We have photos of Spirit sitting on a blanket on his luggage. Cute, but not steps for making cakes.

Daniel has just informed me that photo was taken on my camera, not his. That means no photos were actually recorded to the SD card.
At first, I was in shock; I just couldn’t believe there were absolutely no photos. Panic began to set in at the thought of this series.
I started laughing.
It is after all, just cakes. Right?
I can recreate the photos by simply baking more cakes. It’s not like I’ve lost photos of loved one’s no longer with us.
This is what life is all about: mishaps with sisters chasing you and you trip, shoving your teeth back into your gums, or sticking a crayon up your nose, for whatever reason, and getting it stuck.
I’m not sure this is even as bad as making a cake and finding the dog has eaten a third of it moments before your party guests arrive.
Since this moment was destined to become one of those funny stories we will tell later and laugh, why not just laugh about it now?
The greater issue was how to proceed with the blog at this point. The decision was unanimous to post what I have and add the photos when I have the chance to bake them again.
So, for now, the cake recipes and details will be posted without photos.
The next time something doesn’t go according to “the plan,” ask yourself this: “In a year, will this be funny? In 6 months? After a good night’s sleep?”
If the answer to any of those is “Yes,” then go ahead and laugh now!
Love,
Shari


