by Deb D | Deb_D, Fabric, Our Art, Quilting
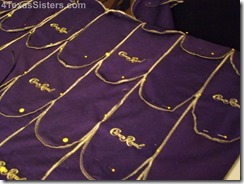
Last year, I created a Crown Royal patchwork quilt. This year I decided to use the fronts and backs to make this one.
There are 9 rows of 7 bags. The quilting will be along the edges of the bags. I edged the sides (all 4 sides) with a dark purple flowered print, then added the batting and a yellow gold satin for the backing. I will use the edges of the backing for the binding. I will add a picture of the finished quilt at a later date.
by Deb D | Deb_D, Fabric, Our Art, Quilting
One of my friends from the Richard A. Anderson VFW Post #8953 told me they had quite a few Crown Royal bags. For those of you who might not know what that is – I didn’t either because I don’t drink Crown Royal. It is a bag made of a very lightweight flannel in a size to fit the bottle. They come in small sizes & large sizes. After working with them for awhile, I found out that within each size, they are not even the same size all the time.
So, I took on the project of making a Crown Royal quilt. Let’s step back here a minute – why is it that when you sew, everybody thinks you can do everything? I have NEVER in my life made a quilt. This was to be my first quilt & I was scared to death.
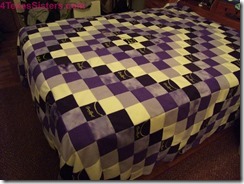
I spent months & months researching patterns for the quilt, bought books, searched on the internet, & thought about it a lot. Since this was probably going to be my one & only quilt, I turned to an Excel spreadsheet to lay out the pattern instead of buying a quilting program for my computer. For those who don’t know me, I am slightly Obsessive Compulsive Anal Retentive, to some maybe a bit more than slightly. I laid out 3 different patterns that I liked & this is my final decision:
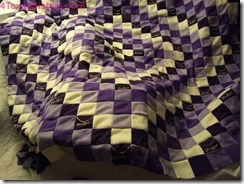
This is a King/Queen size quilt and there are 625 individual squares that make up this quilt. I sewed 5 squares together in a line & then sewed 4 more rows of 5 squares. I combined these 5 rows into one big square. I repeated this 24 more times (giving me twenty-five 5″ square squares).
I started with a specialty square in the middle of the quilt & built my strips, alternating colors as I went. I used the flannel bags, front & back, & light fleece – white, purple tie-dye, darker purple & a light lilac, for the front. Finding the right colors was another time consuming thing.
Now remember, I am using a home sewing machine, with this HUGE quilt once it is all put together. By rolling the quilt up so I only had a little bit at a time under the needle, I finally got all of the squares within squares put together. Now comes the fun part – putting the batting & backing on the front. I laid the quilt front side down & laid the batting on the back then, after piecing the backing together (wasn’t large enough), I pinned the 3 layers together to do the quilting. What to do! what to do!
More tight rolling to get it in the needle area & turning it around to do only 1/4 at a time. I decided to do the quilting in the corners only instead of across the whole quilt & started in the middle & worked my way to the outside of the quilt.
I decided to use the sides of the bags as my binding so I had to cut them & sew them into a long strip – long enough to go around the outside of the quilt. I pinned it on the back side & folded it over & sewed it. I had a few problems with the corners but persevered & completed the quilt. It only took me 2 years or so to complete it because as I ran into a problem, I would put it aside so I could do some more research. I don’t like to keep working on a problem after I become frustrated with it – I just get in more trouble.
Here is a picture of the quilt before I put the batting, backing or binding on it.
by Deb D | Deb_D, Fabric, Our Art, Quilting
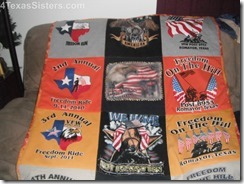
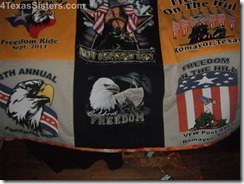
I had purchased several t-shirts for a benefit run by our local VFW over the years. I decided to make a quilt for the benefit using the previous year’s t-shirts as the basis. Each t-shirt had two design faces so that enabled me to have 8 panels. I found additional t-shirts of a patriotic theme so that I would have an even number (12). This quilt was a personal size quilt (or maybe it would fit a twin size bed).
I cut out the panels in 12″x12″ squares. In order to strengthen the fabric, I used some iron-on stabilizer. I laid the pattern out in 3 panels across and 4 panels down. For one of the extra panels, I had to manufacture. I was trying to keep my additional colors to either a black or blue background. The only other suitable panel I found was on a white t-shirt. So, I cut out & glued the white part I cut out onto one of the black t-shirt backs & stitched some rick-rack around the edge to cover the white border. I thought it came out pretty good.
I used the edges of the backing as the binding. I quilted it & then cut & folded the sides to make the binding.
